MoveIt Quickstart in RViz
The quickest way to get started using MoveIt is through its RViz plugin. Rviz is the primary visualizer in ROS and an incredibly useful tool for debugging robotics. The MoveIt Rviz plugin allows you to setup virtual environments (scenes), create start and goal states for the robot interactively, test various motion planners, and visualize the output.
Getting Started
If you haven’t already done so, make sure you’ve completed the steps in Getting Started.
Step 1: Launch the Demo and Configure the Plugin
Launch the demo:
roslaunch panda_moveit_config demo.launch rviz_tutorial:=true
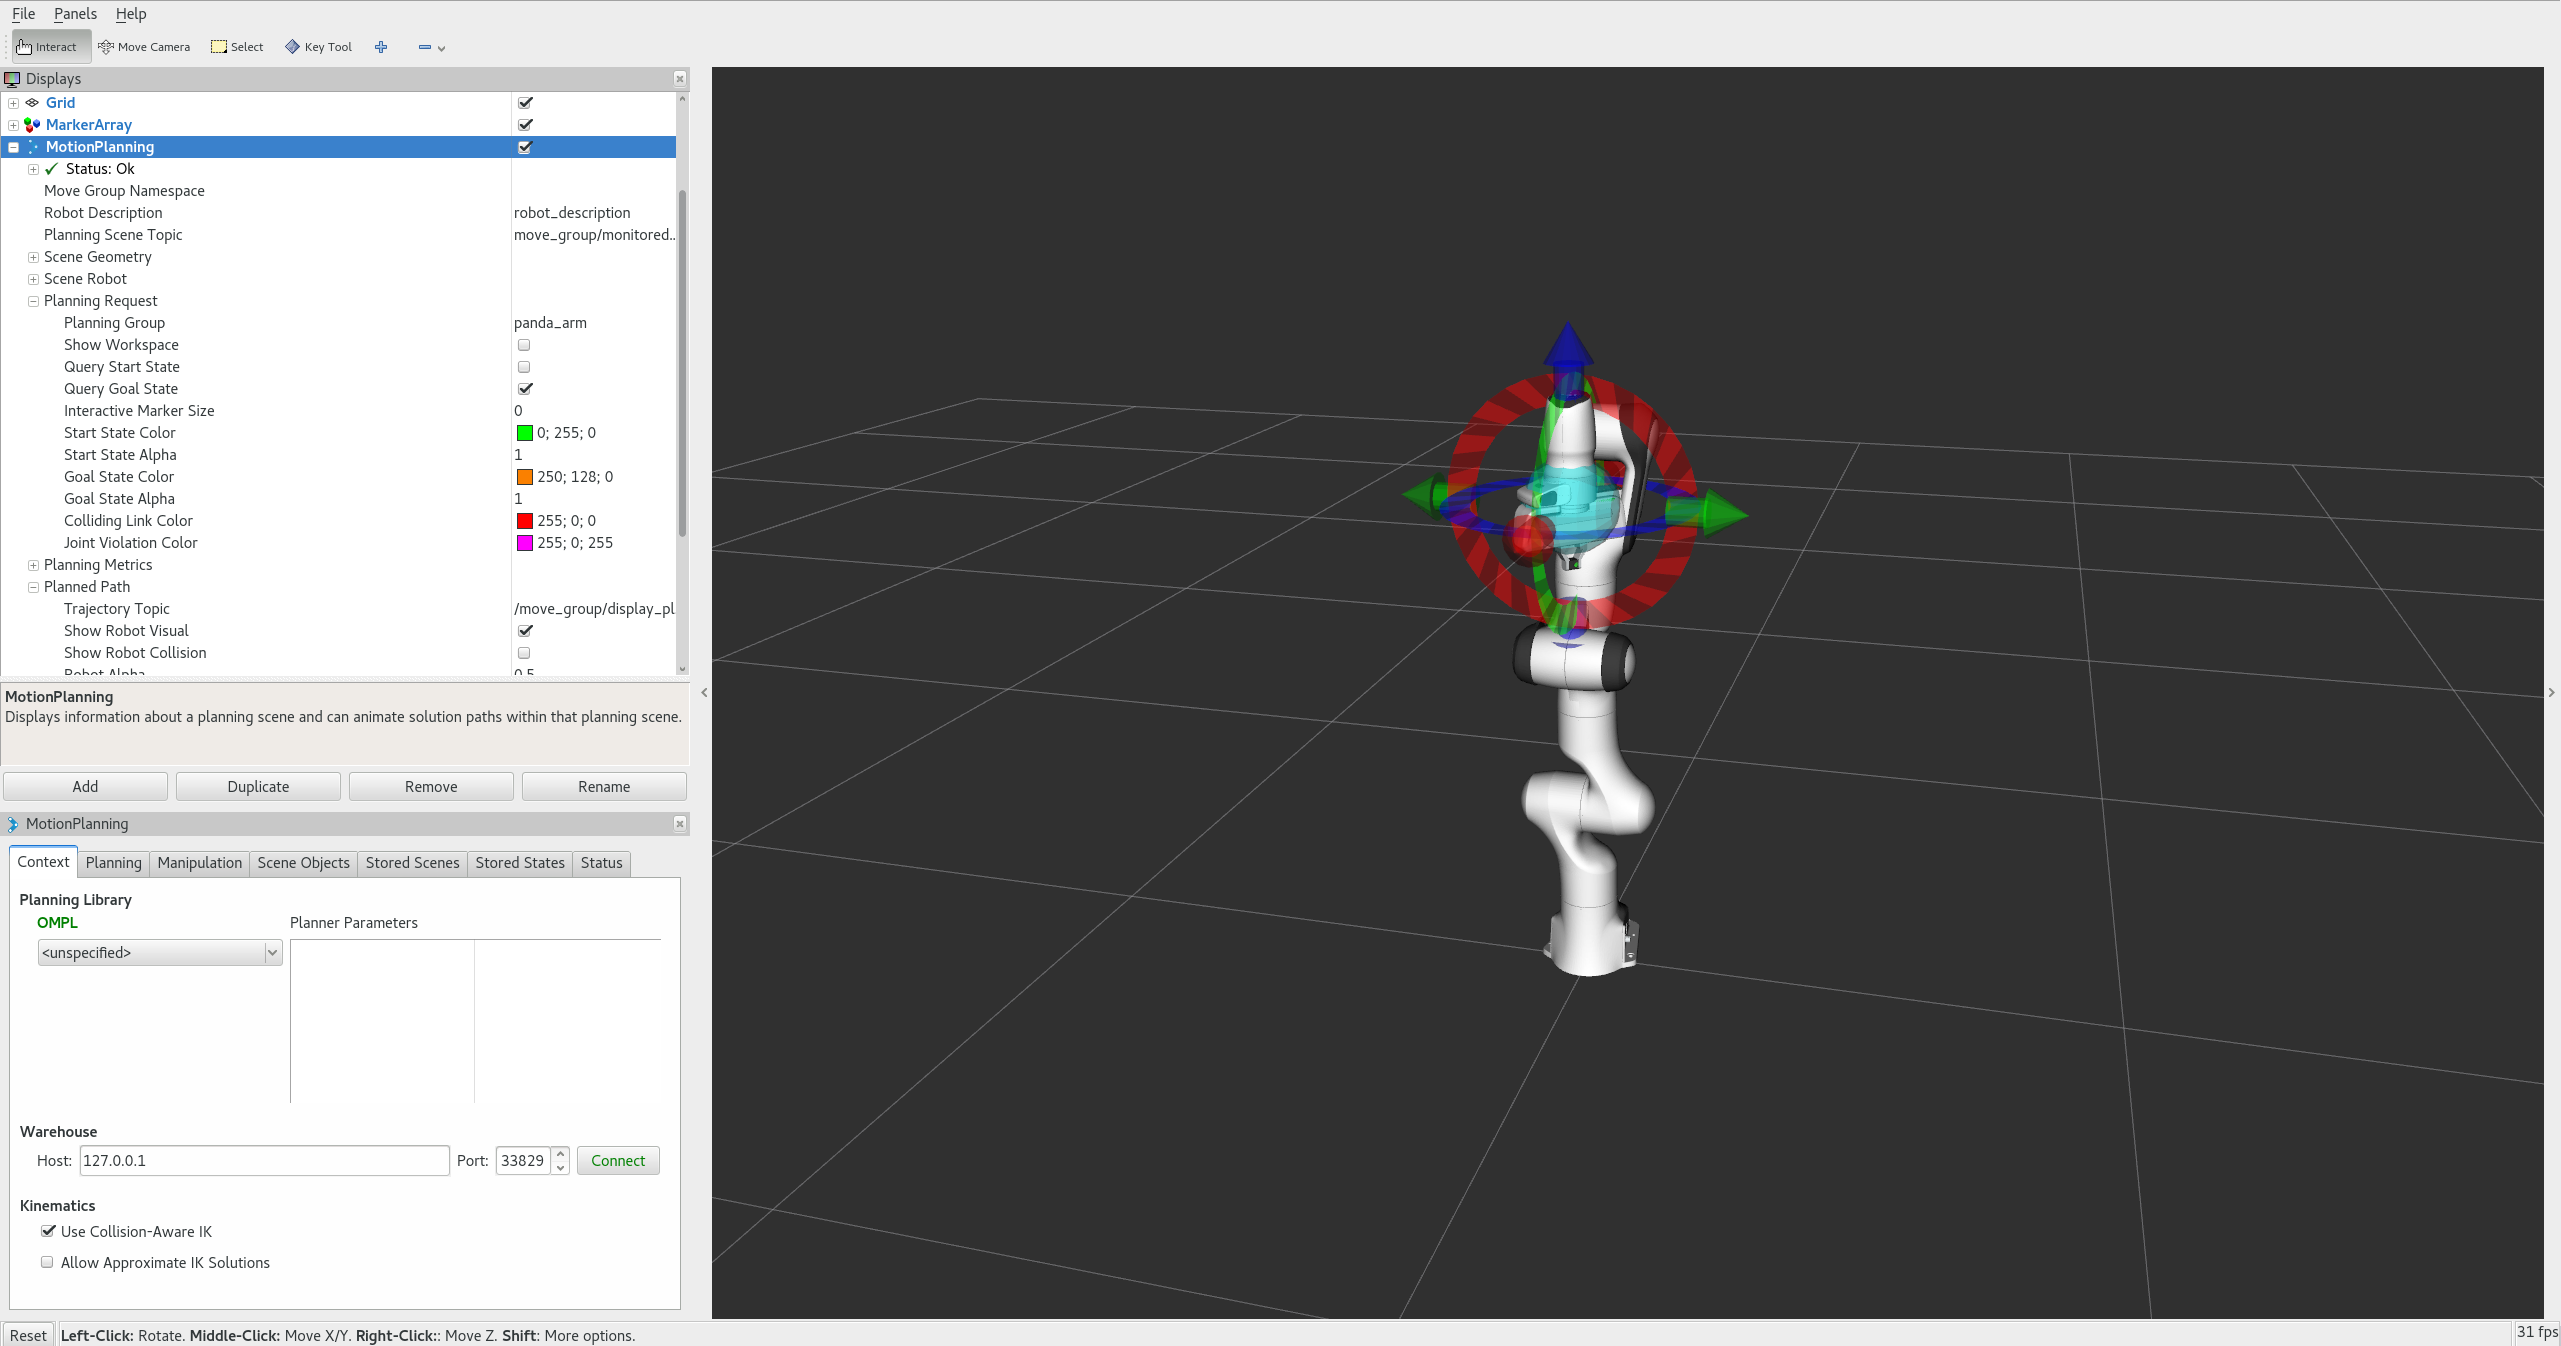
If you are doing this for the first time, you should see an empty world in RViz and will have to add the Motion Planning Plugin:
- You should see an empty world in RViz:
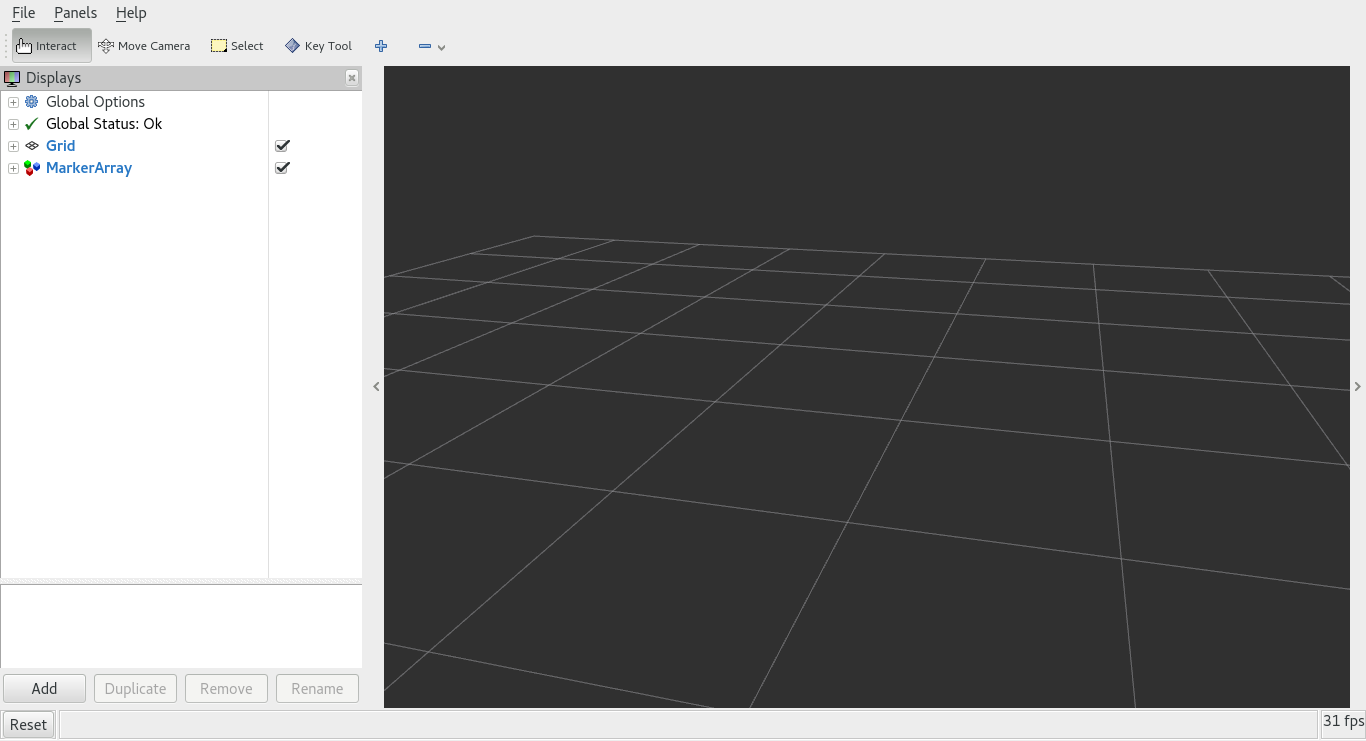
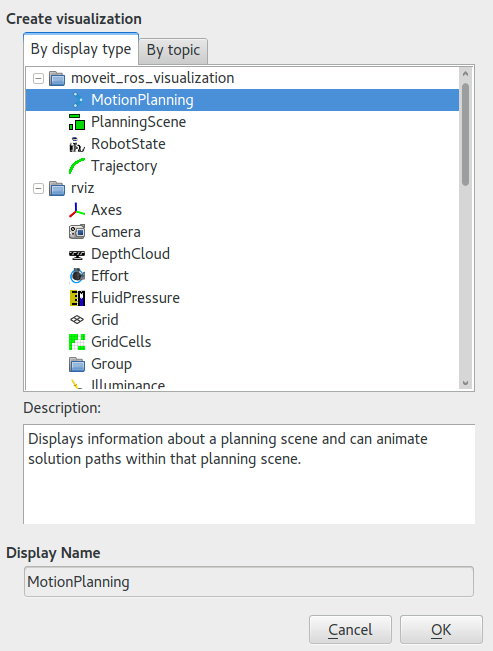
- In the RViz Displays Tab, press Add:
- From the moveit_ros_visualization folder, choose “MotionPlanning” as the DisplayType. Press “Ok”.
- You should now see the Panda robot in RViz:
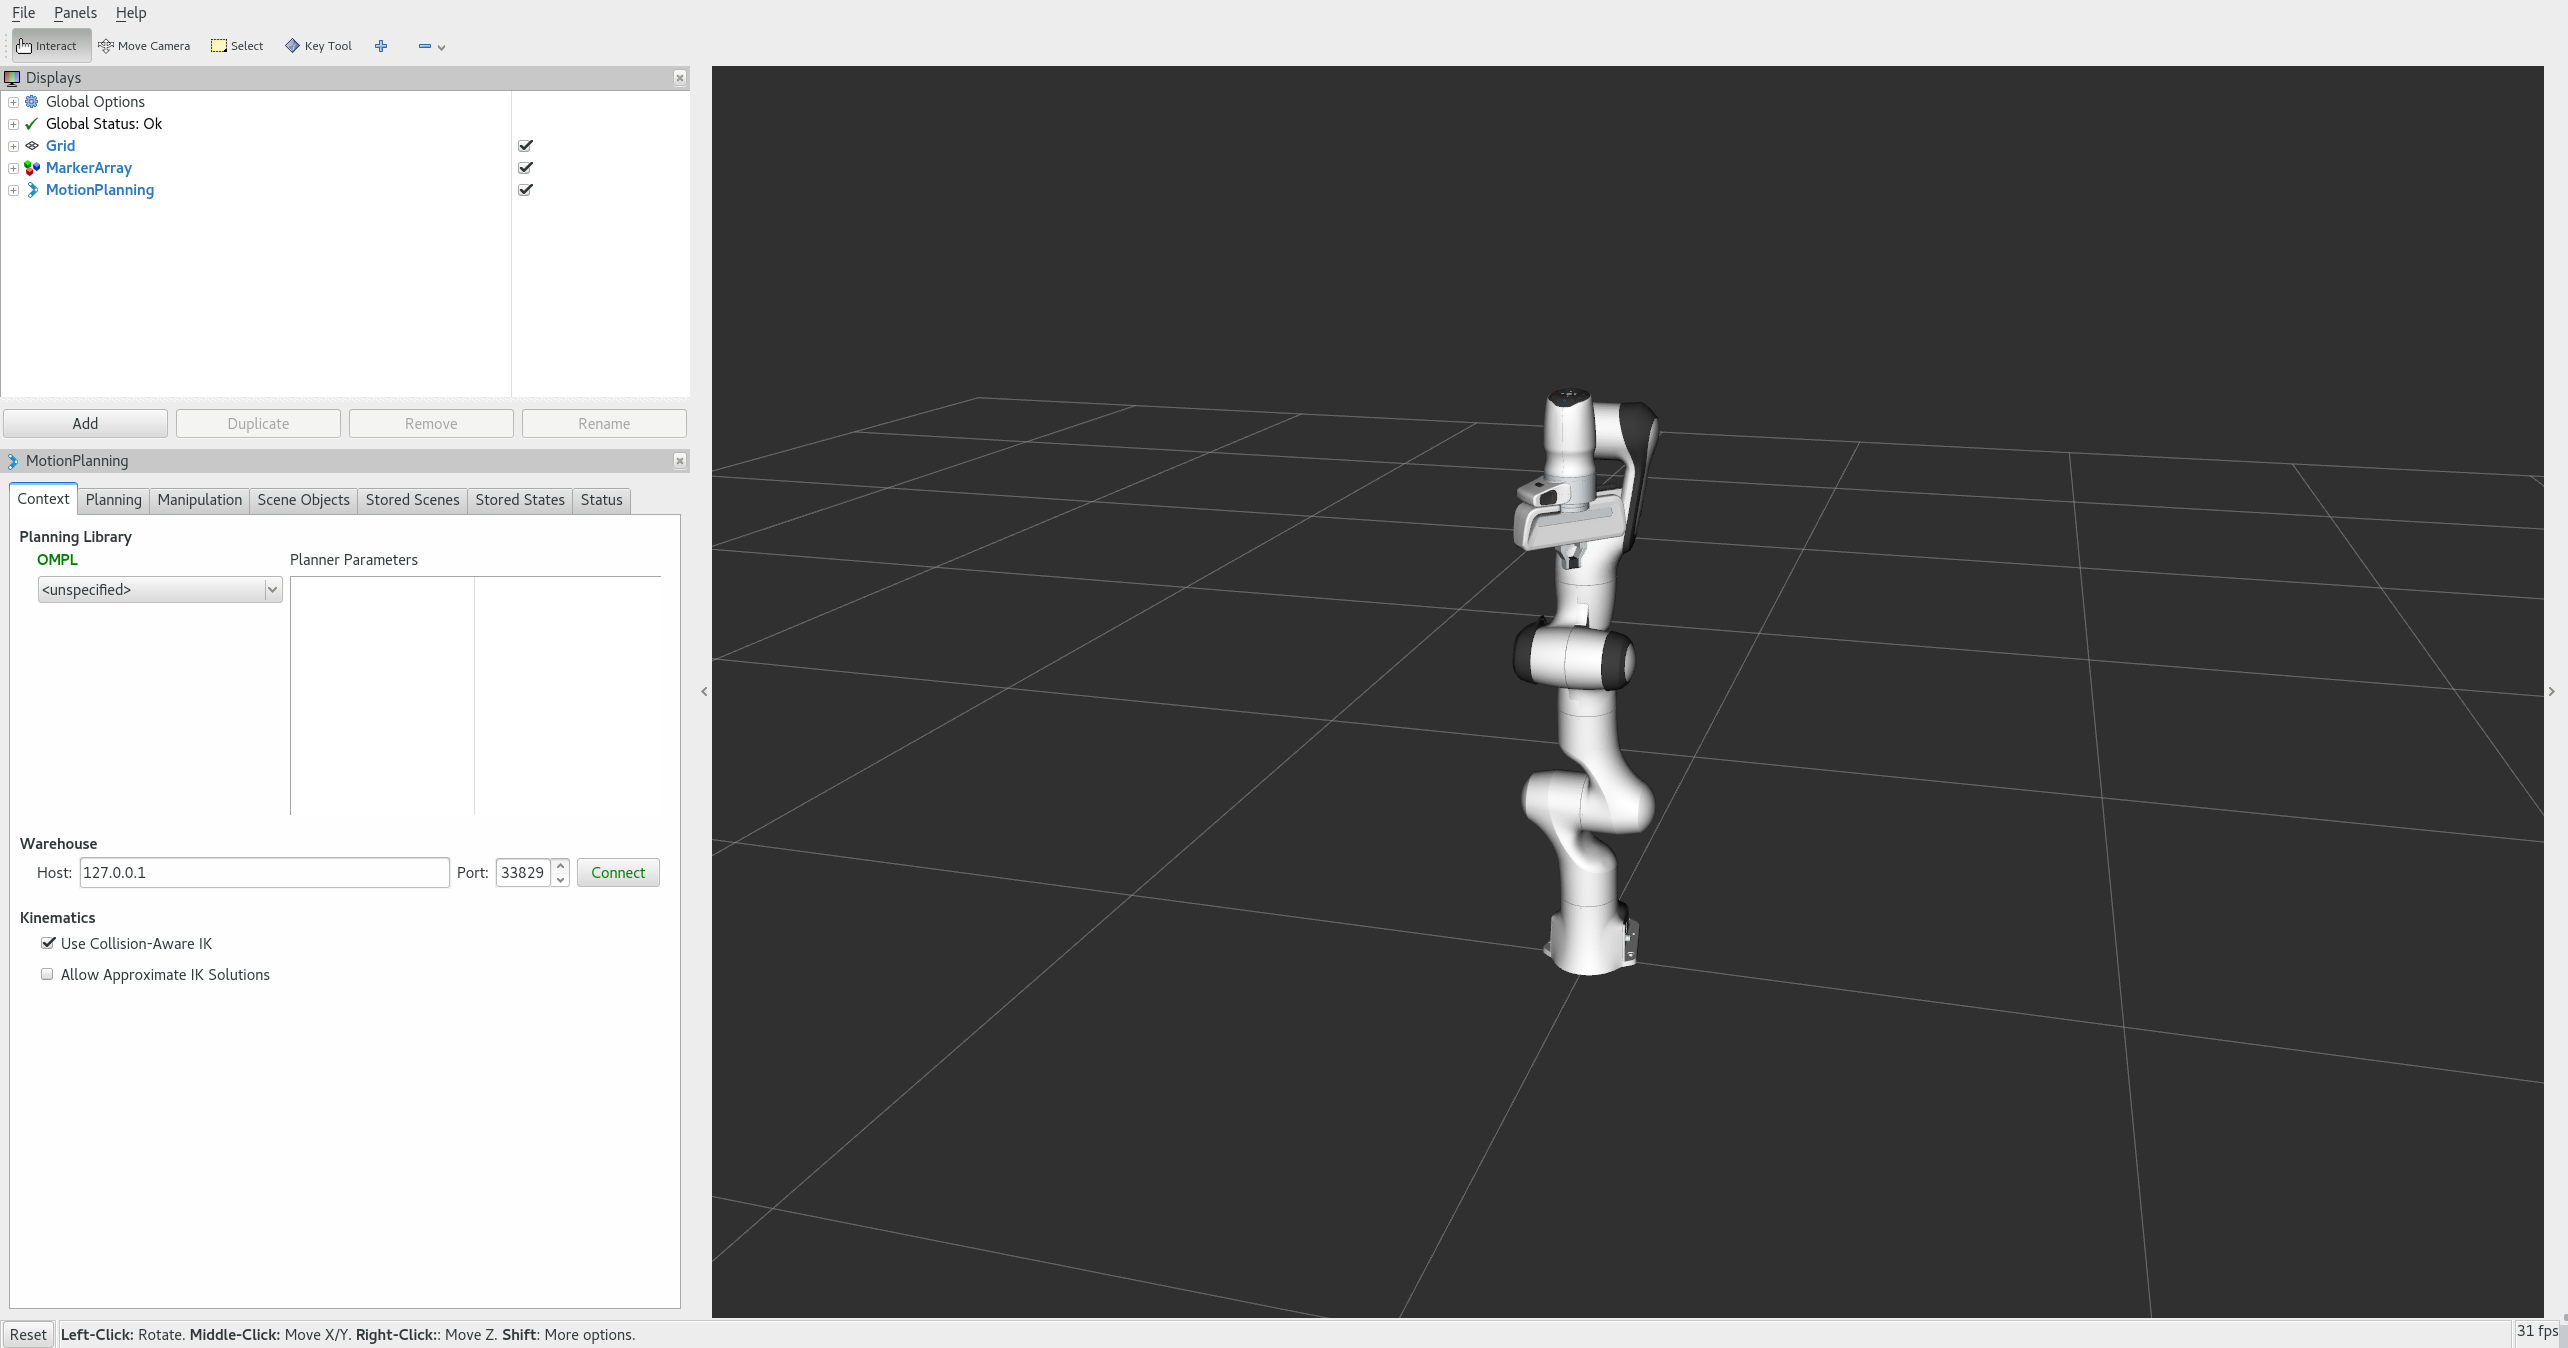
- Once you have the Motion Planning Plugin loaded, we can configure it. In the “Global Options” tab of the “Displays” subwindow, set the Fixed Frame field to
/panda_link0 - Now, you can start configuring the Plugin for your robot (the Panda in this case). Click on “MotionPlanning” within “Displays”.
- Make sure the Robot Description field is set to
robot_description. - Make sure the Planning Scene Topic field is set to
/planning_scene. - In Planning Request, change the Planning Group to
panda_arm. - In Planned Path, change the Trajectory Topic to
/move_group/display_planned_path.
- Make sure the Robot Description field is set to
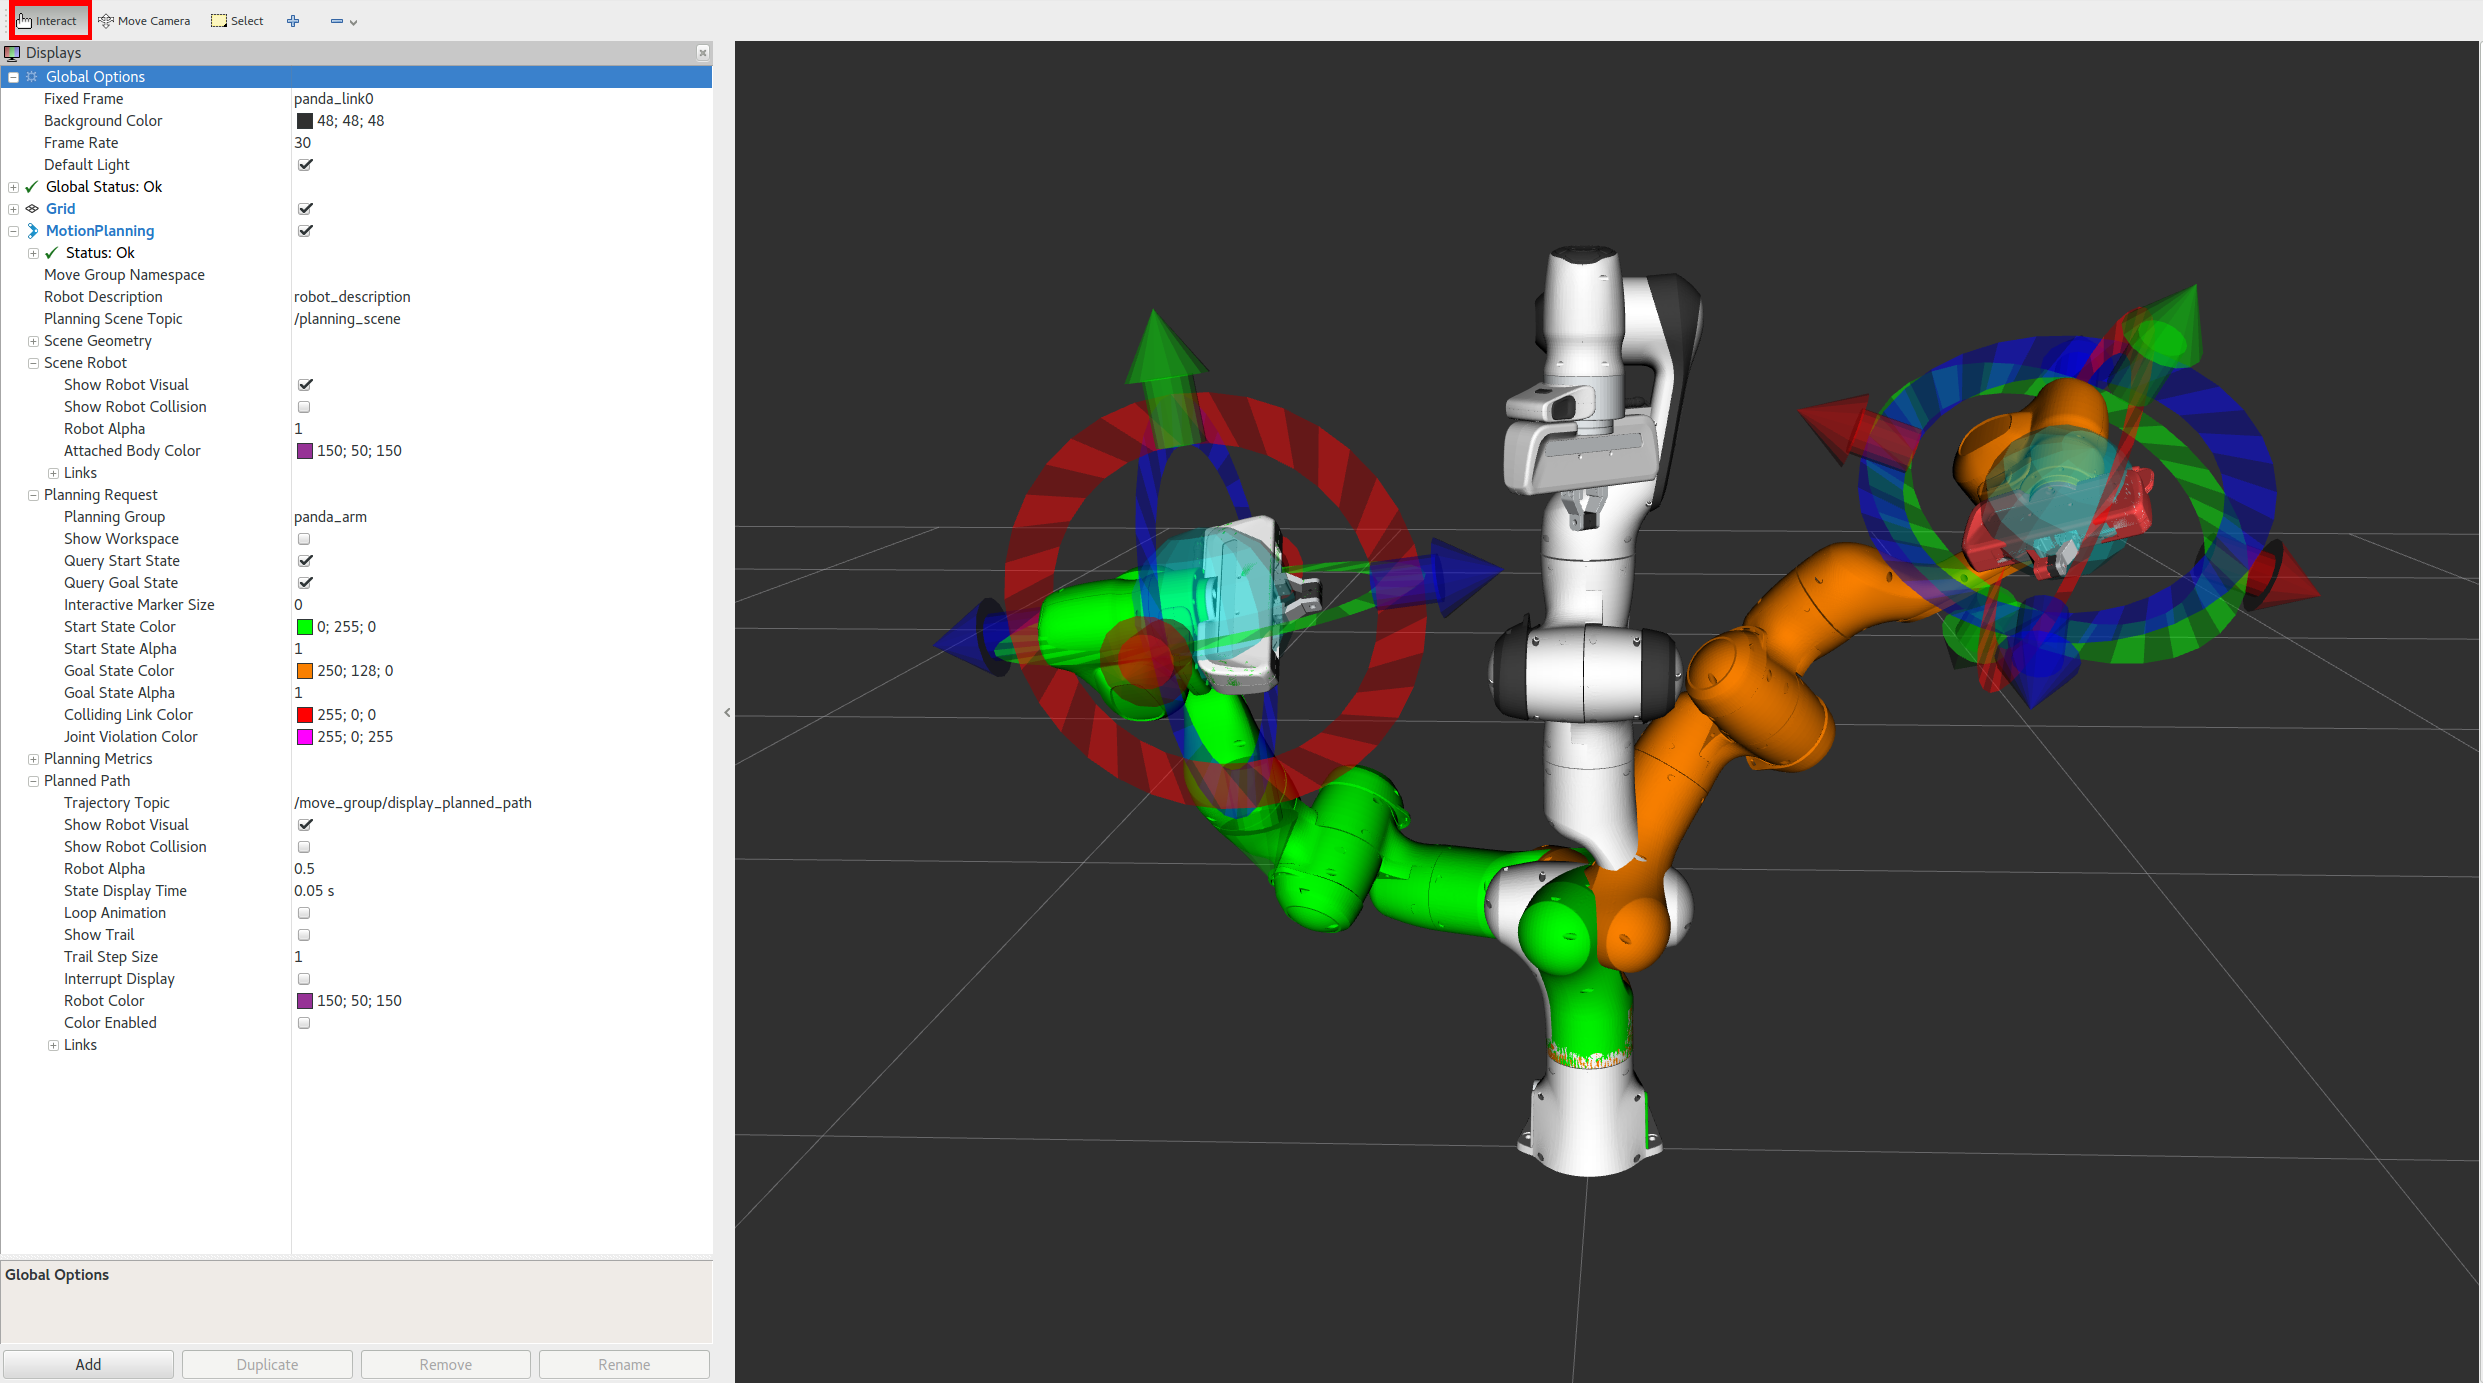
Step 2: Play with the Visualized Robots
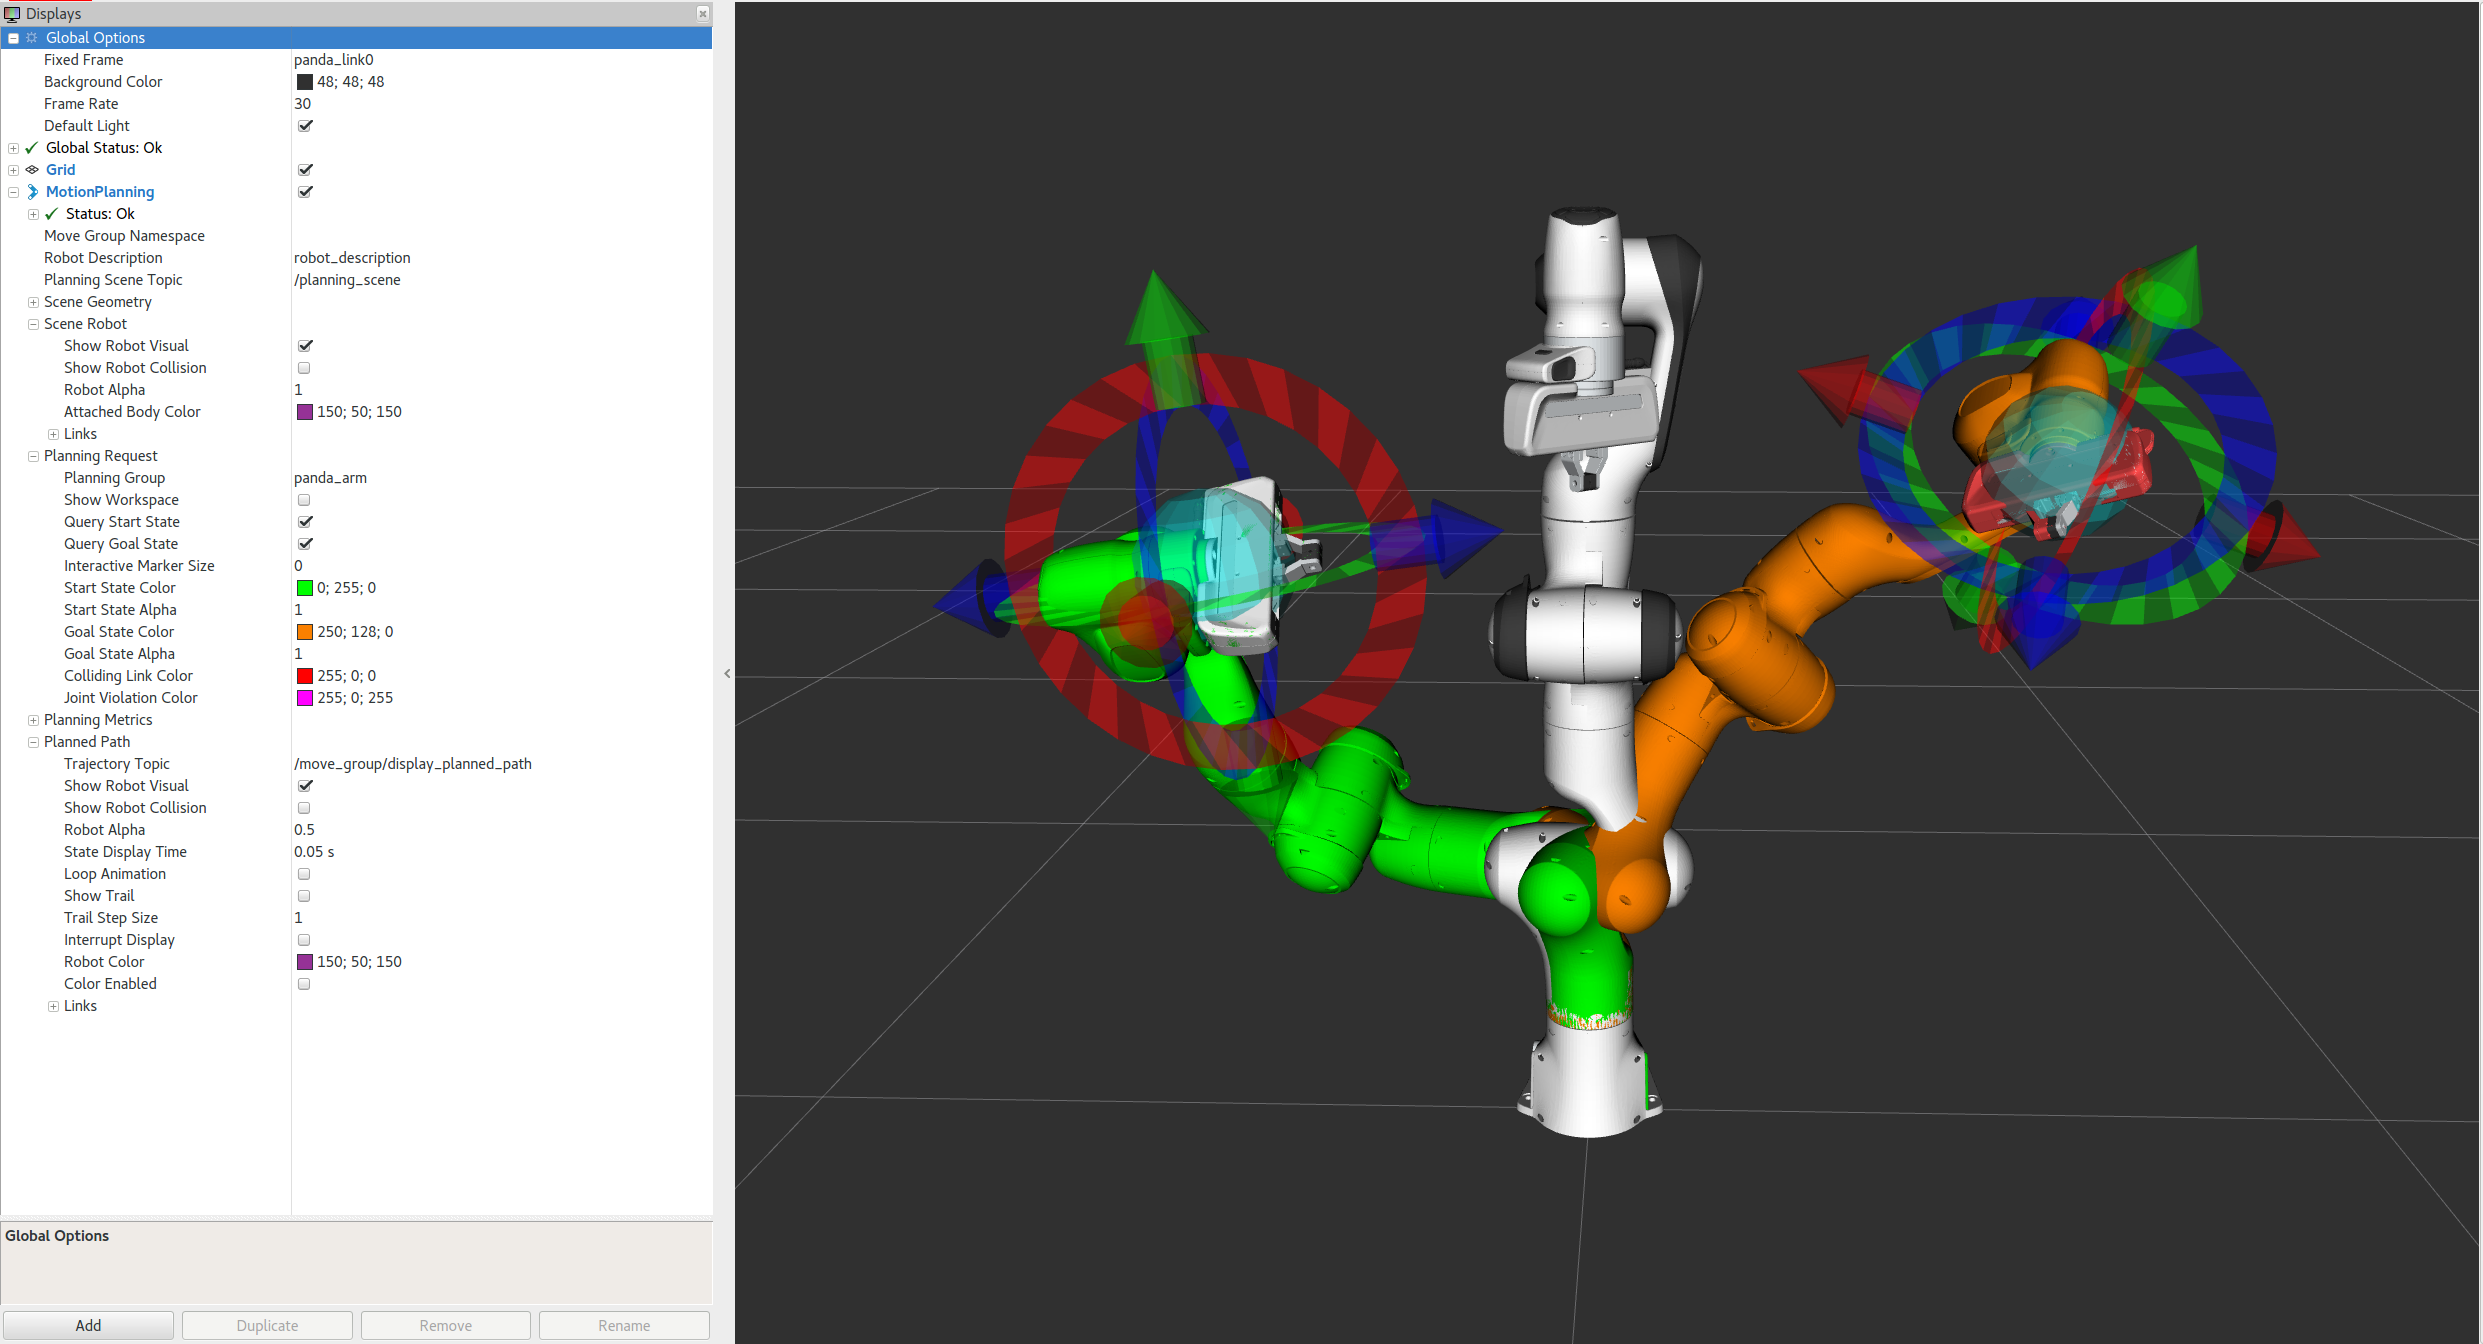
There are four different overlapping visualizations:
- The robot’s configuration in the
/planning sceneplanning environment (active by default). - The planned path for the robot (active by default).
- Green: The start state for motion planning (disabled by default).
- Orange: The goal state for motion planning (active by default).
The display states for each of these visualizations can be toggled on and off using checkboxes:
- The planning scene robot using the Show Robot Visual checkbox in the Scene Robot tab.
- The planned path using the Show Robot Visual checkbox in the Planned Path tab.
- The start state using the Query Start State checkbox in the Planning Request tab.
- The goal state using the Query Goal State checkbox in the Planning Request tab.
- Play with all these checkboxes to switch on and off different visualizations.

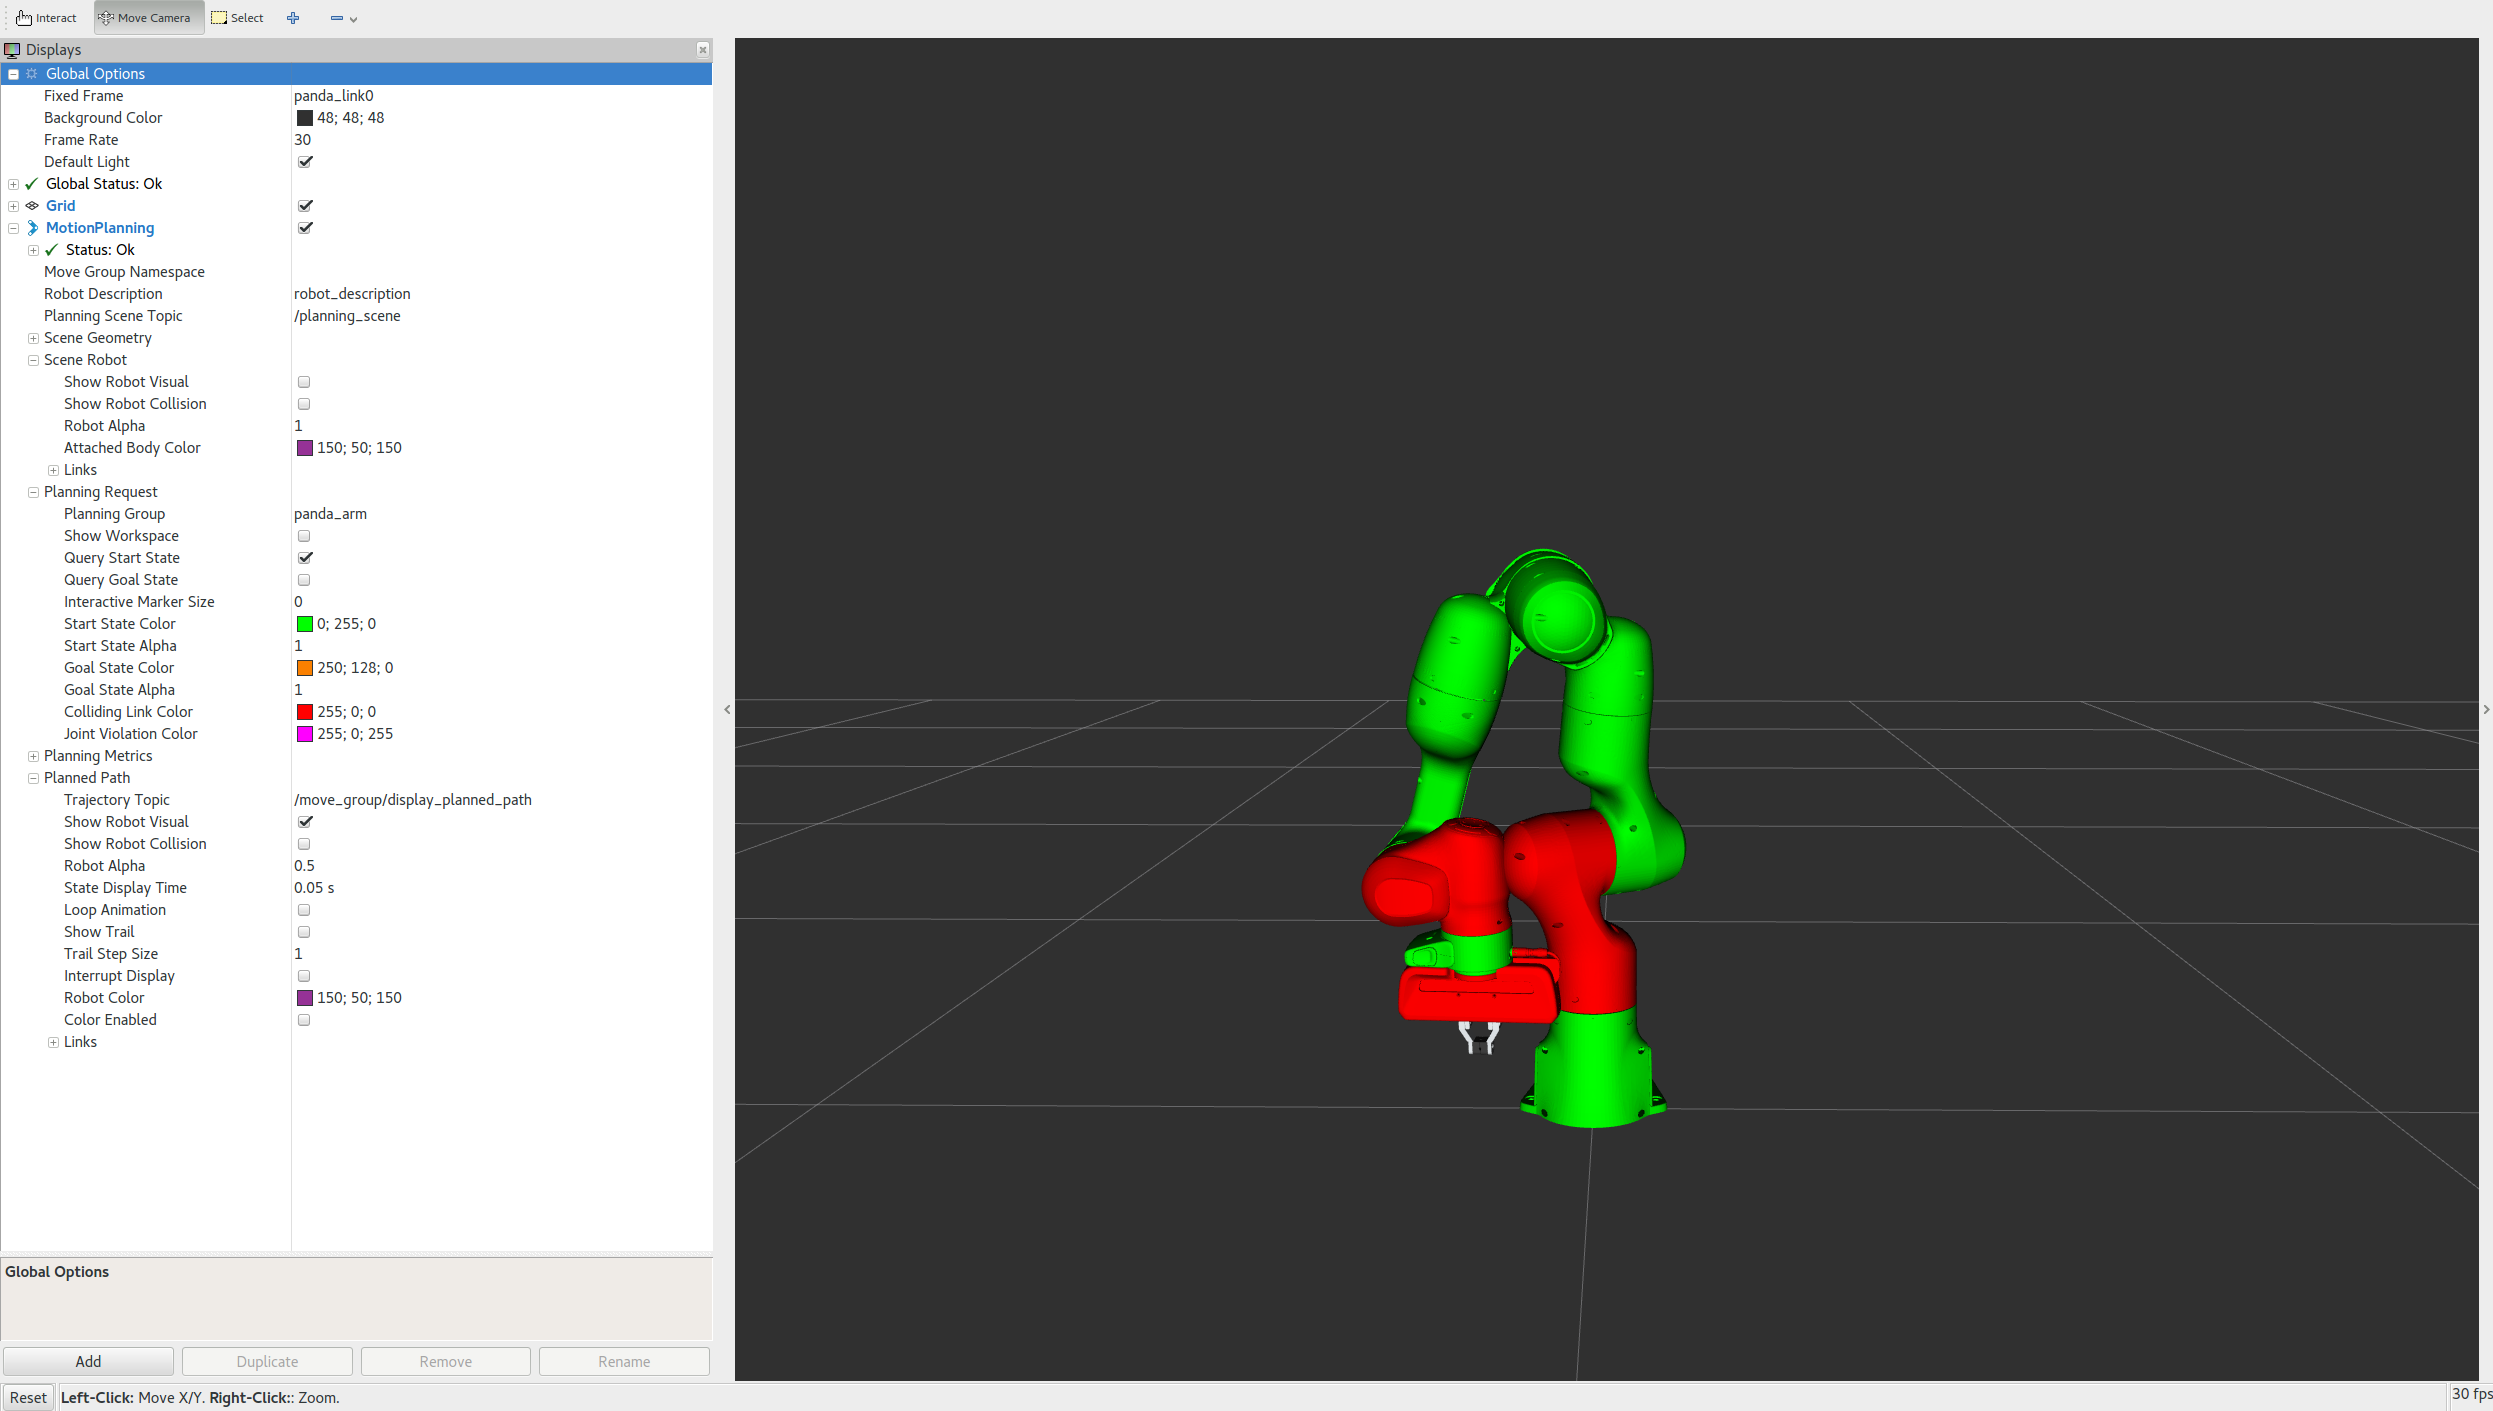
Step 3: Interact with the Panda
For the next steps we will want only the scene robot, start state and goal state:
- Check the Show Robot Visual checkbox in the Planned Path tab
- Un-check the Show Robot Visual checkbox in the Scene Robot tab
- Check the Query Goal State checkbox in the Planning Request tab.
- Check the Query Start State checkbox in the Planning Request tab.
There should now be two interactive markers. One marker corresponding to the orange colored arm will be used to set the “Goal State” for motion planning and the other marker corresponding to a green colored arm are used to set the “Start State” for motion planning. If you don’t see the interactive markers press Interact in the top menu of RViz (Note: some tools may be hidden, press “+” in the top menu to add the Interact tool as shown below).
You should now be able to use these markers to drag the arm around and change its orientation. Try it!
Moving into collision
Note what happens when you try to move one of the arms into collision with the other. The two links that are in collision will turn red.
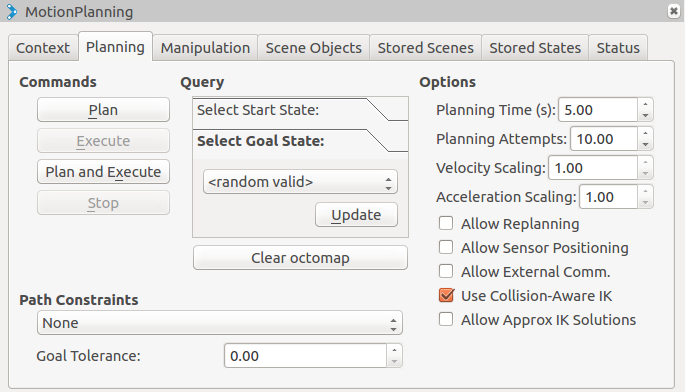
The “Use Collision-Aware IK” checkbox found within the MotionPlanning plugin under the Planning tab allows you to toggle the behavior of the IK solver. When the checkbox is ticked, the solver will keep attempting to find a collision-free solution for the desired end-effector pose. When it is not checked, the solver will allow collisions to happen in the solution. The links in collision will always still be visualized in red, regardless of the state of the checkbox.
Moving out of Reachable Workspace
Note what happens when you try to move an end-effector out of its reachable workspace.

Step 4: Use Motion Planning with the Panda
- Now, you can start motion planning with the Panda in the MoveIt RViz Plugin.
- Move the Start State to a desired location.
- Move the Goal State to another desired location.
- Make sure both states are not in collision with the robot itself.
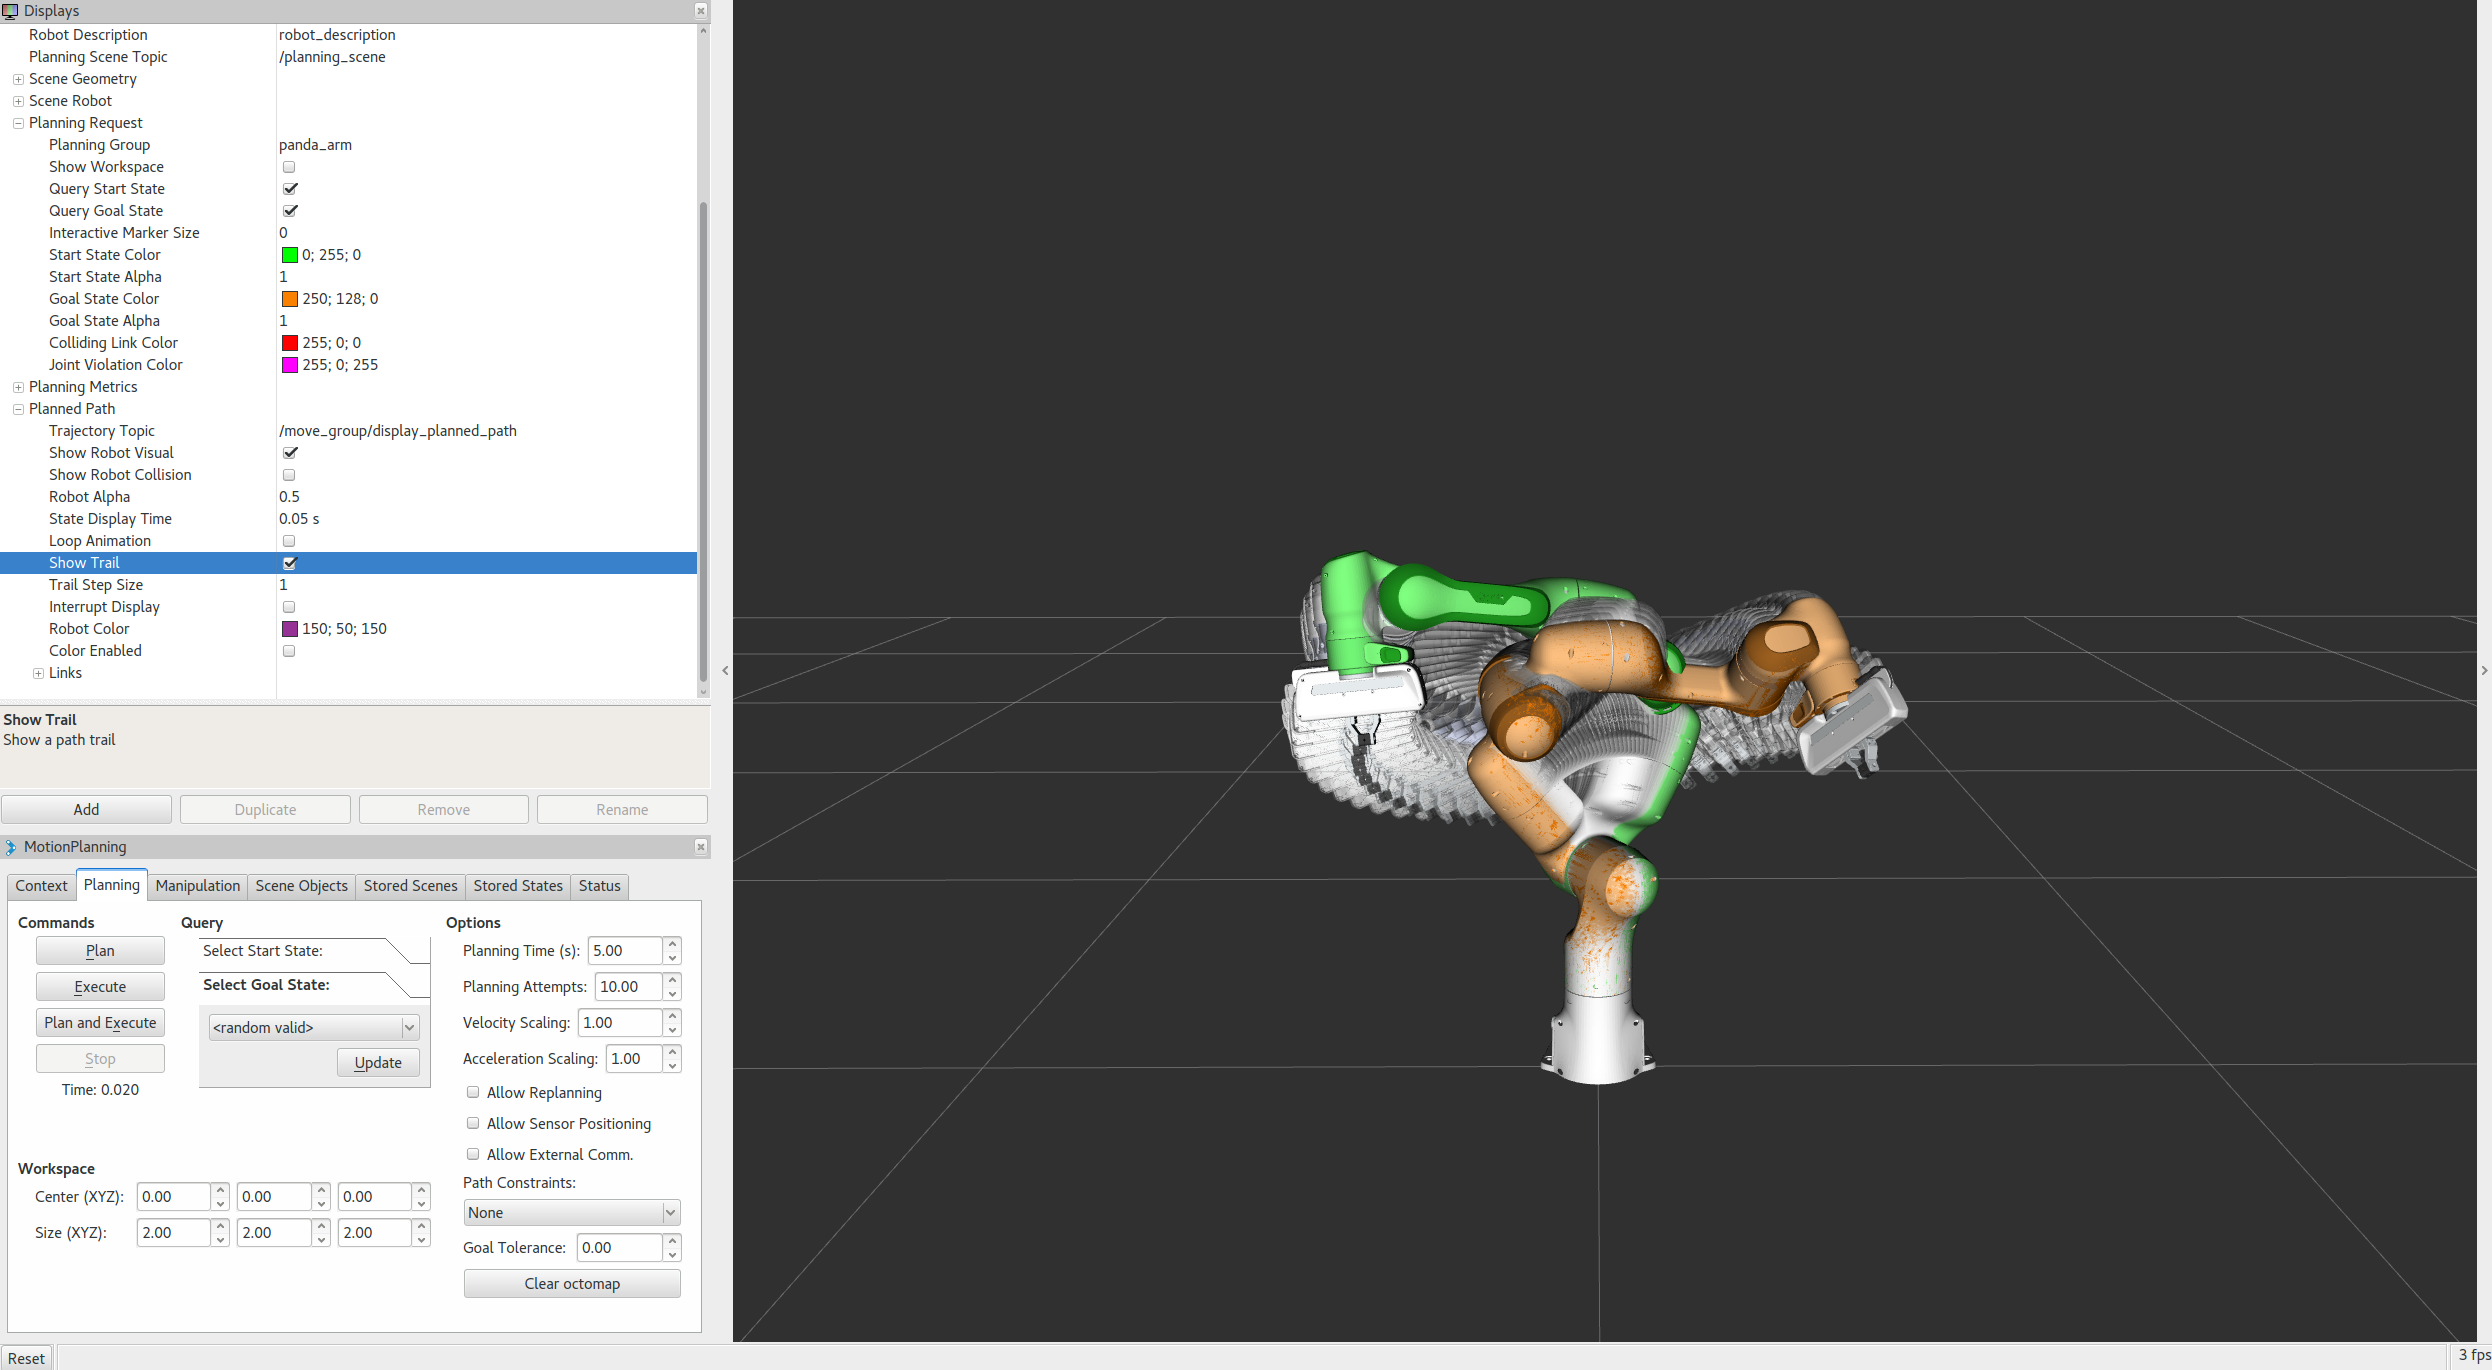
- Make sure the Planned Path is being visualized. Also check the Show Trail checkbox in the Planned Path tab.
- In the MotionPlanning window under the Planning tab, press the Plan button. You should be able to see a visualization of the arm moving and a trail.
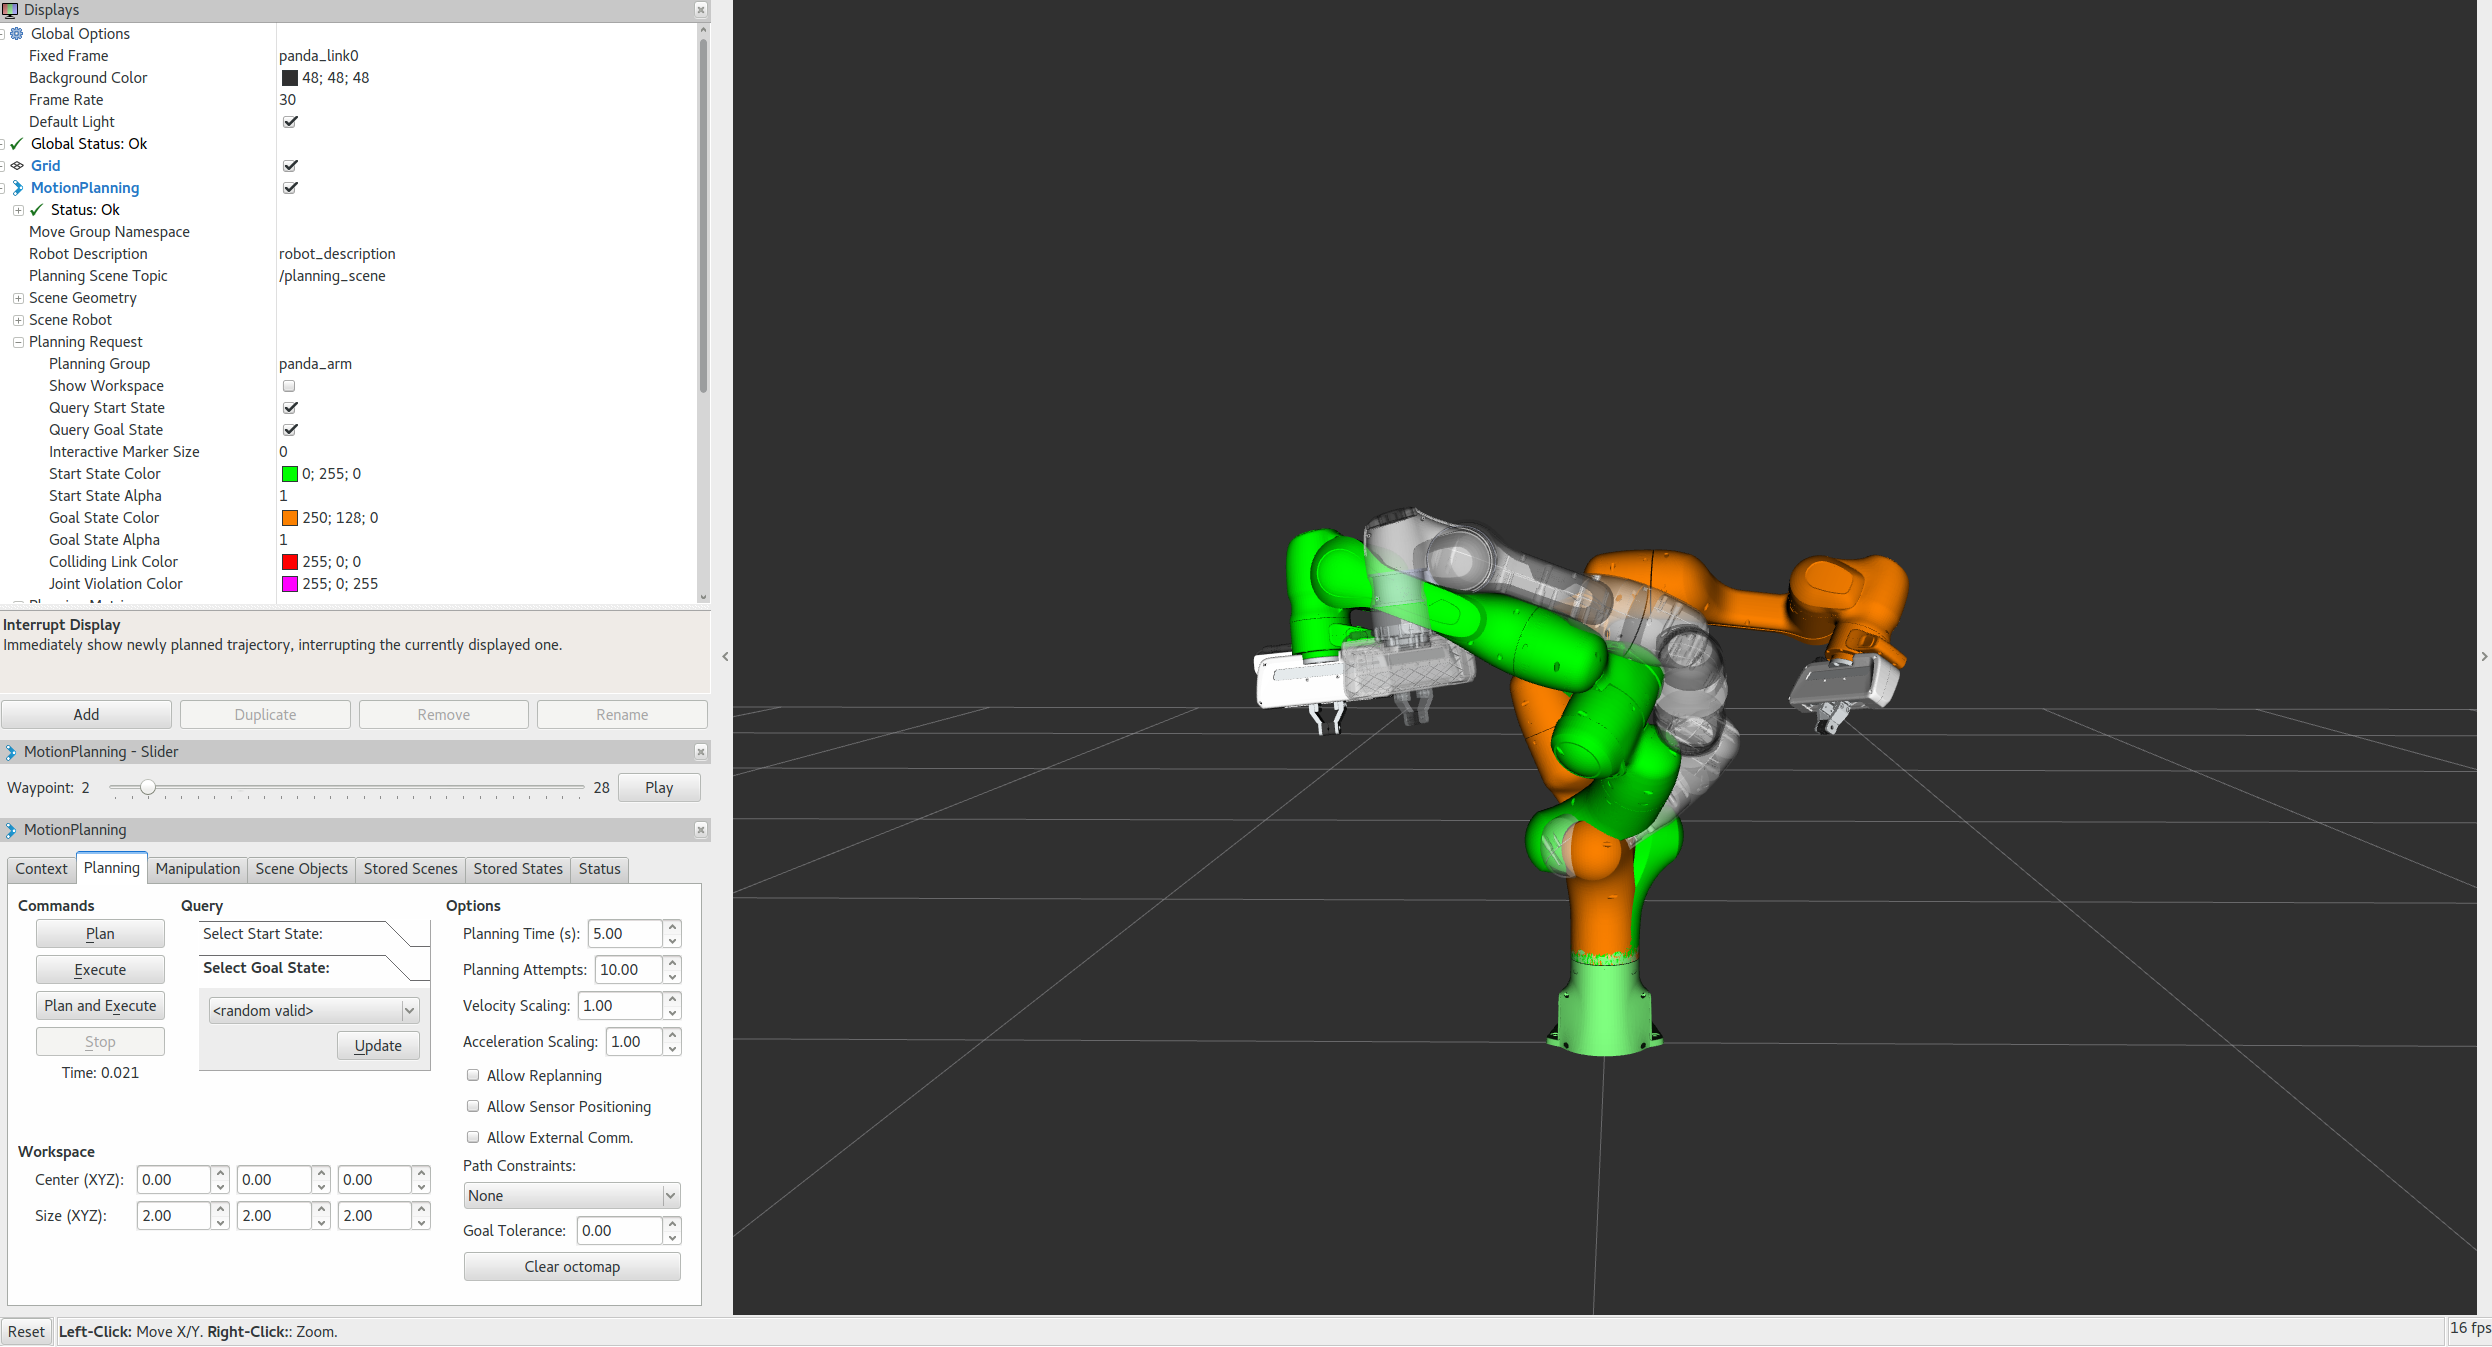
Introspecting Trajectory Waypoints
Available since: Indigo 0.7.10, Kinetic and Lunar 0.9.7
You can visually introspect trajectory point by point on RViz.
- From “Panels” menu, select “MotionPlanning - Slider”. You’ll see a new Slider panel on RViz.
- Set your goal pose, then run Plan.
- Play with the “Slider” panel, e.g. move the slider, push “Play” button.
NOTE: Once you placed your EEF to a new goal, be sure to run Plan before running Play – otherwise you’ll see the waypoints for the previous goal if available.
Next Steps
RViz Visual Tools
Many of the tutorials use moveit_visual_tools to step through a demo. Before continuing on to the next tutorials it is a good idea to enable the RvizVisualToolsGui.
From “Panels” menu, select “RvizVisualToolsGui”. You’ll see the new panel added to RViz.

Saving Your Configuration
RViz enables you to save your configuration under File->Save Config. You should do this before continuing on to the next tutorials.
Next Tutorials
- To Create your own
robot_moveit_configpackage look at the MoveIt Setup Assistant tutorial. - To use Move Group to control your robot using C++ check out the Move Group Interface
- To use Move Group to control your robot using Python check out the Move Group Python Interface
Open Source Feedback
See something that needs improvement? Please open a pull request on this GitHub page