Table of Contents
Introduction
ViSP library allows to control the real Panda robot from Franka Emika to perform for example a position-based visual-servoing or an image-based visual-servoing. In this tutorial, we show how to simulate a Franka robot thanks to CoppeliaSim and ROS.
The simulation is a physical simulation with a model that has been accurately identified from a real Franka robot. If you are using this simulator we would appreciate that you cite this paper:
C. Gaz, M. Cognetti, A. Oliva, P. Robuffo Giordano, A. De Luca, Dynamic Identification of the Franka Emika Panda Robot With Retrieval of Feasible Parameters Using Penalty-Based Optimization. IEEE RA-L, 2019.
Install dependencies
To be able to build the package to simulate a Franka robot, you need the following dependencies
- visp
- Orokos-kdl
- visp_bridge ROS package part of vision_visp ROS meta package
Install dependencies using rosdep
The easiest way to install these dependencies is to run rosdep following this tutorial.
Install dependencies from source
There is also the possibility to build the dependencies from source.
- Update Ubuntu packages
  $ sudo apt-get update
  $ sudo apt-get upgrade
- Install requested 3rd parties for ViSP
$ sudo apt-get install libopencv-dev libx11-dev liblapack-dev libeigen3-dev \ libv4l-dev libzbar-dev libpthread-stubs0-dev libjpeg-dev \ libpng-dev libdc1394-dev libpcl-dev - Install Orocos-kdl needed for inverse and direct robot arm kinematics computation
$ sudo apt-get install liborocos-kdl-dev
- Install optional Iit Butterworth Filter
$ sudo apt install iir1-dev
- Build ViSP from source. There is no need to install ViSP in
/usr.$ mkdir -p ~/software/visp $ cd ~/software/visp $ git clone https://github.com/lagadic/visp.git $ mkdir -p visp-build $ cd visp-build $ cmake ../visp $ make -j4
- Build
vision_vispROS package. We suppose here that ROS is already installed.$ cd ~/catkin_ws/src $ git clone https://github.com/lagadic/vision_visp.git --branch $ROS_DISTRO $ source /opt/ros/$ROS_DISTRO/setup.bash $ cd ~/catkin_ws/ $ catkin_make --cmake-args -DCMAKE_BUILD_TYPE=Release -DVISP_DIR=~/software/visp/visp-build
Build visp_ros
- Clone
visp_rospackage in the cartkin workspace$ cd ~/catkin_ws/src $ git clone https://github.com/lagadic/visp_ros.git
- Build package
  $ source /opt/ros/$ROS_DISTRO/setup.bash
  $ cd ~/catkin_ws/
  $ catkin_make --cmake-args -DCMAKE_BUILD_TYPE=Release -DVISP_DIR=~/software/visp/visp-build
Install Coppeliasim
Download CoppeliaSim
- Download the last edu version of
CoppeliaSimfor Ubuntu 18.04 or 20.04 from here (at the time this tutorial was written it wasCoppeliaSim_Edu_V4_2_0_Ubuntu18_04.tar.xzorCoppeliaSim_Edu_V4_2_0_Ubuntu20_04.tar.xzrespectively). - Extract the archive content in
~/softwareworkspace. - At this point you should have
CoppeliaSimin~/software/CoppeliaSim_Edu_V4_2_0_Ubuntu18_04/folder or in~/software/CoppeliaSim_Edu_V4_2_0_Ubuntu20_04/depending which Ubuntu version you are using.
Install ROSInterface for CoppeliaSim
At this point the installation depends on installed ROS version.
ROS melodic
Since
CoppeliaSimcomes with aROSInterfacebuild for ROSmelodicthere is no need to buildROSInterface.ROS noetic
Since
CoppeliaSimcomes with aROSInterfacebuild for ROSmelodicand we are using ROS noetic, we need to:- Get the last version of
libPluginfrom here.$ cd ~/software/CoppeliaSim_Edu_V4_2_0_Ubuntu20_04/programming $ mv libPlugin/ libPlugin_orig/ $ git clone https://github.com/CoppeliaRobotics/libPlugin.git --branch coppeliasim-v4.2.0
- Get
ROSInterfacenode source code$ cd ~/catkin_ws/src/ $ git clone --recursive https://github.com/CoppeliaRobotics/simExtROSInterface.git \ --branch coppeliasim-v4.2.0 sim_ros_interface - Build
ROSInterfacenode$ cd ~/catkin_ws $ source /opt/ros/noetic/setup.bash $ export COPPELIASIM_ROOT_DIR=~/software/CoppeliaSim_Edu_V4_2_0_Ubuntu20_04 $ sudo apt-get install python3-pip xsltproc $ pip3 install xmlschema $ catkin_make --cmake-args -DCMAKE_BUILD_TYPE=Release
- Copy
ROSInterfacein the CoppeliaSim directory$ cp devel/lib/libsimExtROSInterface.so ~/software/CoppeliaSim_Edu_V4_2_0_Ubuntu20_04
- Get the last version of
Examples with Franka simulator
Single Arm Visual Servoing
Here we show how to run a position-based visual-servoing (PBVS) or an image-based visual-servoing simulation (IBVS) over an 8 cm Apriltag target.
To properly run the simulator, you will need three terminals, one for roscore, one for CoppeliaSim, and one for the ROS node that does for example the visual-servo (note that roscore should be started before CoppeliaSim):
- In terminal 1 run:
  $ source /opt/ros/$ROS_DISTRO/setup.bash
  $ roscore
In terminal 2 run:
- If you are using ROS noetic on Ubuntu 20.04 use:
  $ source /opt/ros/$ROS_DISTRO/setup.bash
  $ cd ~/software/CoppeliaSim_Edu_V4_2_0_Ubuntu20_04
  $ ./coppeliaSim.sh
- If you are rather using ROS melodic on Ubuntu 18.04 use:
  $ source /opt/ros/$ROS_DISTRO/setup.bash
  $ cd ~/software/CoppeliaSim_Edu_V4_2_0_Ubuntu18_04
  $ ./coppeliaSim.sh
Now in
CoppeliaSimGUI, enter menu"File > Open scene..."and browse to~/catkin_ws/src/visp_ros/tutorial/franka/coppeliasim/scenefolder to selectfrankaSim.ttt.
At this point, in
CoppeliaSimGUI you should see the following feedback:[sandboxScript:info] Simulator launched, welcome! [CoppeliaSim:loadinfo] checking for an updated CoppeliaSim version... [CoppeliaSim:loadinfo] This CoppeliaSim version is up-to-date. [CoppeliaSim:info] Loading scene... [CoppeliaSim:info] Default scene was set-up. [CoppeliaSim:info] Loading scene (/home/user/catkin_ws/src/visp_ros/tutorial/franka/coppeliasim/scene/frankaSim.ttt). Serialization version is 23. [CoppeliaSim:info] File was previously written with CoppeliaSim version 4.02.00 (rev 5) [CoppeliaSim:info] Scene opened. ROS interface was found.
Be sure that ROS interface is found. If this is not the case, it means:
- either that you forget to
source ~/catkin_ws/devel/setup.bash, - either that you have an issue that comes from ROS interface build step described here.
Note that a circular motion could be applied to the AprilTag. To this end, in the
"frankaSim Scene hierarchy"tab, double-click on the document icon just at the right ofCuboid(see previous image) to open the Lua script. A new window should open, where setting the value ofwvariable for example to 0.2 in functionsysCall_actuation()and restarting the script allows to make the AprilTag moving when simulation is started.function sysCall_actuation()simTime = sim.getSimulationTime()w = 0.2sim.setJointTargetVelocity(BJ_Handle, w)sim.setJointTargetVelocity(TJ_Handle,-w)end- If you are using ROS noetic on Ubuntu 20.04 use:
In terminal 3 run:
To run a position-based visual-servoing (PBVS) over an Apriltag target (source code in tutorial-franka-coppeliasim-pbvs-apriltag.cpp), run:
  $ source ~/catkin_ws/devel/setup.bash
  $ rosrun visp_ros tutorial-franka-coppeliasim-pbvs-apriltag --adaptive_gain --plot --enable-coppeliasim-sync-mode
After applying a user click in the window that displays images acquired by the camera, you should be able to see something similar to the following video:
To run an image-based visual-servoing (IBVS) example (source code in tutorial-franka-coppeliasim-ibvs-apriltag.cpp), run rather:
$ rosrun visp_ros tutorial-franka-coppeliasim-ibvs-apriltag --adaptive_gain --plot --enable-coppeliasim-sync-mode
Here you should rather see something similar to the next video:
To access advanced options, you may add--helpcommand line option:$ rosrun visp_ros tutorial-franka-coppeliasim-ibvs-apriltag --help
In particular, there is the
--plotoption that could be interesting to activate to display visual features error and camera velocities.
Joint Impedance Control
To run the joint impedance control example the general principle remains the same as in the previous section except that:
- in terminal 2 where CoppeliaSim is launched, you should set simulation step time between 1 ms and 3 ms. To this end, enter CoppeliaSim
"Simulation > Simulation settings"menu. In the new "Simulation Settings" panel, modify"Time Step [s]"to 0.001 or 0.003 max, press Enter and close the panel.Now you should have something similar to:

- in terminal 3 you may launch:
$ rosrun visp_ros tutorial-franka-coppeliasim-joint-impedance-control --enable-coppeliasim-sync-mode
The following video show the resulting robot behavior: The source code is available in tutorial-franka-coppeliasim-joint-impedance-control.cpp.
Cartesian Impedance Control
To run the Cartesian impedance control example the general principle remains the same as in the previous section except that:
- in terminal 2 where CoppeliaSim is launched, if not already done you should set simulation step time between 1 ms and 3 ms. To this end, enter CoppeliaSim
"Simulation > Simulation settings"menu. In the new "Simulation Settings" panel, modify"Time Step [s]"to 0.001 or 0.003 max, press Enter and close the panel.Now you should have something similar to:
- in terminal 3 you may launch:
$ rosrun visp_ros tutorial-franka-coppeliasim-cartesian-impedance-control --enable-coppeliasim-sync-mode
The source code is available in tutorial-franka-coppeliasim-cartesian-impedance-control.cpp.
Dual Arm Visual Servoing
We provide also a CoppeliaSim scene with 2 Franka arms. Here the show how to achieve PBVS with one arm while the other is moving an 8cm AprilTag target.
The general principle remains the same as in the previous section. The differences are that:
in terminal 2 you should open
frankaSimDualArmSetup.tttscene and see something similar to the next image. Simulation step time should be set between 1 ms and 3 ms max.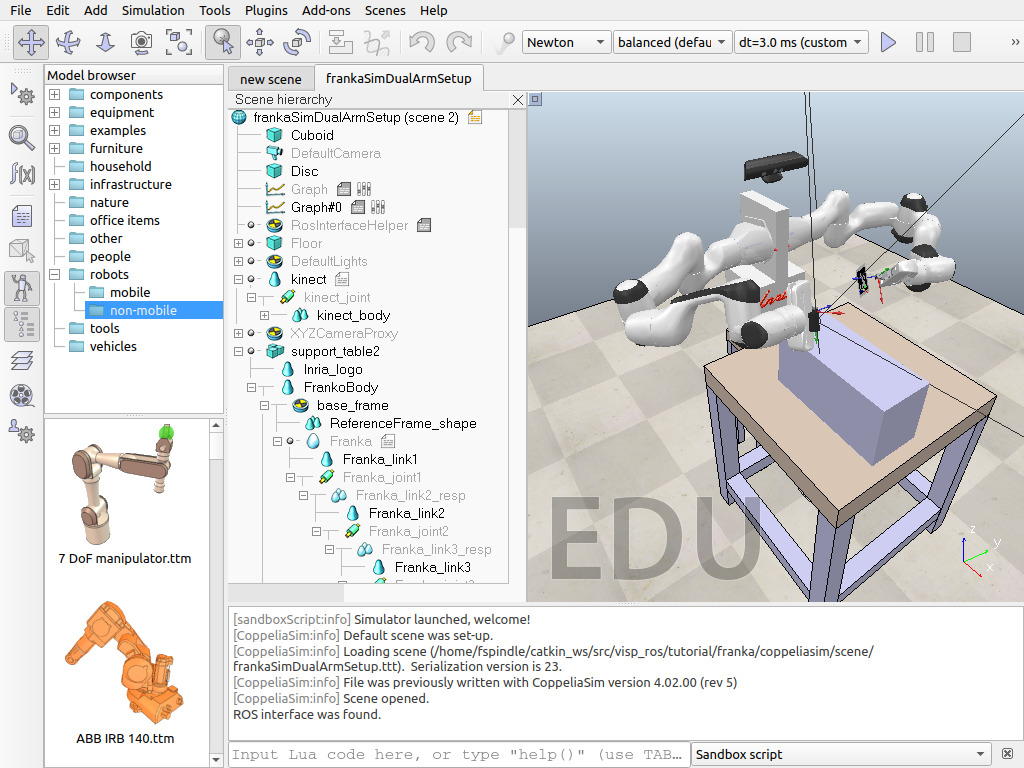
- in terminal 3 you may run the dual arm example (source code available in tutorial-franka-coppeliasim-dual-arm.cpp) where the right arm does à PBVS and the left arm applies a circular motion to an AprilTag target using a cartesian impedance controller:
  $ source ~/catkin_ws/devel/setup.bash
  $ rosrun visp_ros tutorial-franka-coppeliasim-dual-arm --adaptive_gain --enable-coppeliasim-sync-mode
- Note
- At this point, if in terminal 3 you get a segfault like
  $ rosrun visp_ros tutorial-franka-coppeliasim-duar-arm --adaptive_gain --enable-coppeliasim-sync-mode
  ROS is initialized ? yes
  ROS is initialized ? yes
  Coppeliasim sync mode enabled: yes
  Segmentation fault (core dumped)
and in the same time in CoppeliaSim a popup window like the following:you should do the following:
- close CoppeliaSim
- as stated in the popup do the following:
    $ cd ~/software/CoppeliaSim_Edu_V4_2_0_Ubuntu18_04 (or CoppeliaSim_Edu_V4_2_0_Ubuntu20_04)
    $ cp vortexPlugin/* .
Now if you run again the simulation a new popup should appear in CoppeliaSimindicating that you should install a Vortex engine.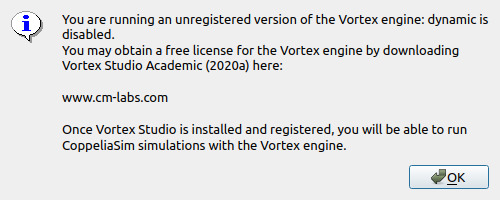
- Browse to https://www.cm-labs.com/. In
"Simulation Software"menu, select"Vortex Studio Academic"and apply for accademic access
Examples with a real Franka robot
We provide also the material to experiment with a real Franka robot equipped with an Intel Realsense D435 RGB-D camera.
- The camera is attached to the robot end-effector thanks to a 3D printed mechanical interface. The STL file is available in
tutorial/franka/real-robot/franka-rs-D435-camera-holder.stlor could be downloaded here. - The extrinsic transformation between the end-effector and the camera frame is given in
~/catkin_ws/src/visp_ros/tutorial/franka/real-robot/eMc.yamlor could be downloaded here. To estimate this extrinsic transformation, you can also run an extrinsic calibration explained in this tutorial. - Camera intrinsic parameters are retrieved thanks to the camera firmware. There is no need to run an intrinsic camera calibration step.
- An image of an AprilTag with ID 0 and size 8 cm that is ready to print is available in
~/catkin_ws/src/visp_ros/tutorial/franka/real-robot/tag36_11_00000-8cm.pngor could be downloaded here.
Single Arm Visual Servoing
To run a position-based visual-servoing (PBVS) over an 8 cm Apriltag target (source code available in tutorial-franka-real-pbvs-apriltag.cpp), run:
  $ cd ~/catkin_ws
  $ ./devel/lib/visp_ros/tutorial-franka-real-pbvs-apriltag --adaptive_gain --plot
After applying a user click in the window that displays images acquired by the camera, you should be able to see something similar to the following video:
Here it is interesting to notice that the source code used for simulation available in tutorial-franka-coppeliasim-pbvs-apriltag.cpp and the one used to control a real robot in tutorial-franka-real-pbvs-apriltag.cpp are similar.To run an image-based visual-servoing (IBVS) example again on an 8 cm AprilTag target (source code available in tutorial-franka-real-ibvs-apriltag.cpp), run rather:
  $ cd ~/catkin_ws
  $ ./devel/lib/visp_ros/tutorial-franka-real-ibvs-apriltag --adaptive_gain --plot
Here also the source code used for simulation available in tutorial-franka-coppeliasim-ibvs-apriltag.cpp and the one used to control a real robot in tutorial-franka-real-ibvs-apriltag.cpp are similar.
To access advanced options, you may add --help command line option. For the IBVS (same for PBVS) example run:
$ ./devel/lib/visp_ros/tutorial-franka-real-ibvs-apriltag --help
In particular, there is the:
--plotoption that could be interesting to display real-time visual features error and camera velocities--eMc <transform.yaml>option that allows to specify your setup extrinsic end-effector to camera transformation. Default usage is equivalent to use--eMc ~/catkin_ws/src/visp_ros/tutorial/franka/real-robot/eMc.yaml--ip <address>option to specify your robot controller Ethernet address. Default usage is equivalent to use--ip 192.168.1.1.--tag_size <size in meter>option to specify the AprilTag black square side lenght in [m]. Default usage is--tag_size 0.08corresponding to an 8 cm AprilTag.
Joint Impedance Control
To run a joint impedance control example on a real Franka robot (source code available in tutorial-franka-real-joint-impedance-control.cpp), you can run:
$ cd ~/catkin_ws
$ ./devel/lib/visp_ros/tutorial-franka-real-joint-impedance-control
As for the previous examples, you can see that the source code used for simulation available in tutorial-franka-coppeliasim-joint-impedance-control.cpp and the one used to control a real robot in tutorial-franka-real-joint-impedance-control.cpp are similar.