RViz User’s Guide
Troubleshooting
If you’re running into problems and have not seen the answer below, please try searching Answers.
Installation
Please see the installation instructions for ROS 2 (which includes RViz) in the ROS 2 documentation.
Startup
To start the visualizer:
ros2 run rviz2 rviz2
When rviz starts for the first time, you will see an empty view:
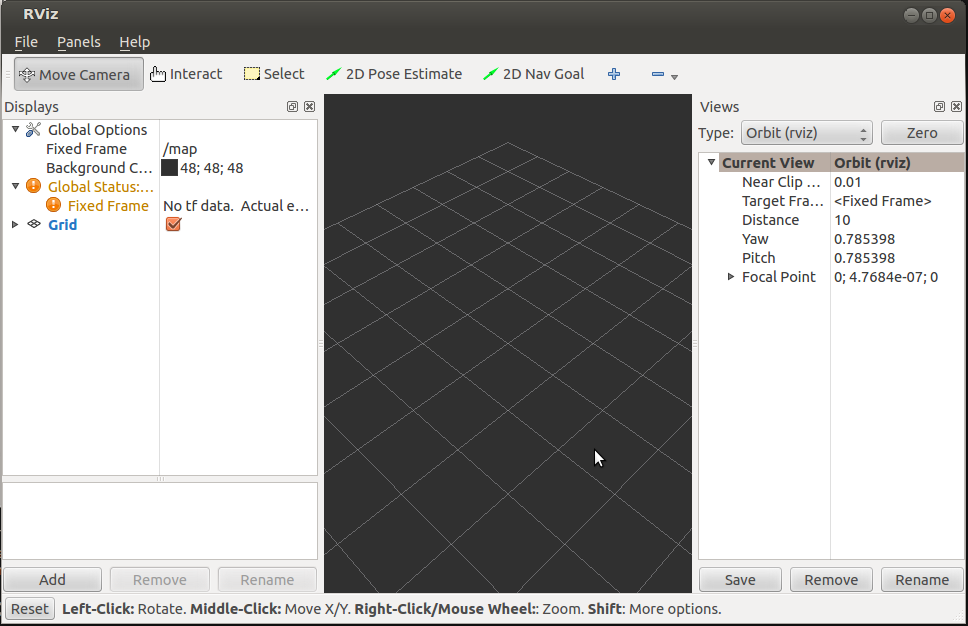
The central area with the grid is the 3D view. On the left is the Displays list, which will show any displays you have loaded. Right now it just contains the global options and the time view, which will be explained later. On the right are some of the other panels, described below.
Displays
A display is something that draws something in the 3D world, and likely has some options available in the displays list. An example is a point cloud, the robot state, etc.
Adding a new display
To add a display, type “control-N” (for “new”) or click the Add button at the bottom:

This will pop up the new display dialog:
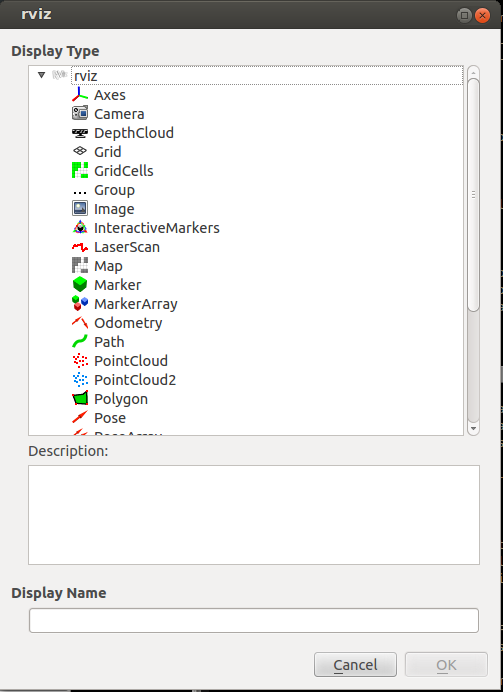
The list at the top shows the available display types, grouped by the plugin that provides them. The text box in the middle gives a description of the selected display type. At the bottom a name can be given to the new instance of the display, which defaults to the name of the type name.
Display Properties
Each display gets its own list of properties. For example:
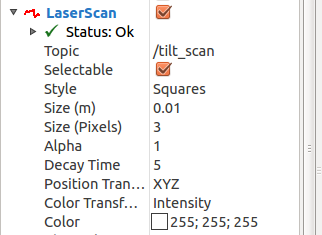
Display Status
Each display gets its own status to show if everything is OK or not. The status will be one of the following: OK, Warning, Error or Disabled. The status is indicated in the display’s title by the text color and icon, as well as in the Status category that can be seen if the display is expanded:
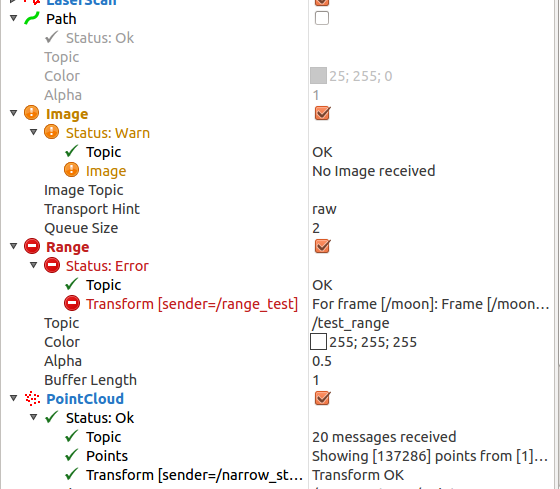
The Status category also expands to show specific status information. This information is different for different displays, and the messages should be self explanatory. The top-level status level for the display is set based on the worst of the sub-statuses.
Organizing Displays
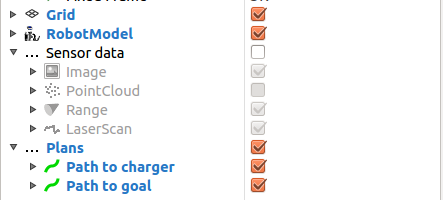
Displays can be moved up or down in the list by dragging them with the left mouse button. Multiple displays can be selected and dragged together. A “Group” display can also be created, which serves as a container for other displays. Displays in a group can be enabled and disabled together with the group’s checkbox. In this example, the “Sensor data” group has been disabled and the “Plans” group is enabled:
Naming Displays
In the above example, the “Group” and “Path” displays have been given meaningful names. This can be done either at creation time in the new display dialog (described above) or any time later by selecting a display and typing “control-R” (for “rename”) or by clicking the “Rename” button.
Configurations
Different configurations of displays are often useful for different uses of the visualizer. A configuration useful for a full PR2 is not necessarily useful for a test cart, for example. To this end, the visualizer can load and save different configurations.
A configuration contains:
Displays and their properties
Tools and their properties
View controller type and settings for the initial viewpoint, plus saved views
Window layout and the list of panels
RViz treats configurations similarly to files in an editor. When a configuration file is opened, changes are made, and the “save” menu (or control-“s”) is triggered, the original config file is overwritten.
When no config file is specified, rviz loads the file
~/.rviz/default.rviz, creating it if it does not exist.
When a config file other than the default is in use, RViz includes the file name in the window title bar. An asterisk (“*”) next to the file name indicates changes have been made since the last time the configuration was loaded or saved. The config file format is YAML.
Views Panel
The “Views” panel shows properties of the current view controller in use, and optionally a list of saved views:
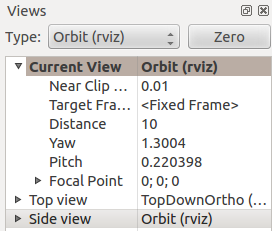
Clicking on a saved view (“Top view” and “Side view” above) copies it to the “Current View” entry and activates it.
The properties of the current view change as the viewpoint is moved with the mouse in the 3D display, but they can also be edited directly via the keyboard for precise control.
There is a combobox control labelled “Type” at the top of the Views panel. This can be used to change the type of the current view controller.
To the right of it is the “Zero” button. This resets the current view controller to look at the point “0, 0, 0” from a short distance away. This is useful to get back to a known location if the viewpoint gets “lost”. The keyboard shortcut for “Zero” is “z”.
Built-in view types
“Views” in RViz are view controllers. They control both the viewpoint and the camera projection. There are 4 built-in types, but more can be added via plugins.
Orbit (default)
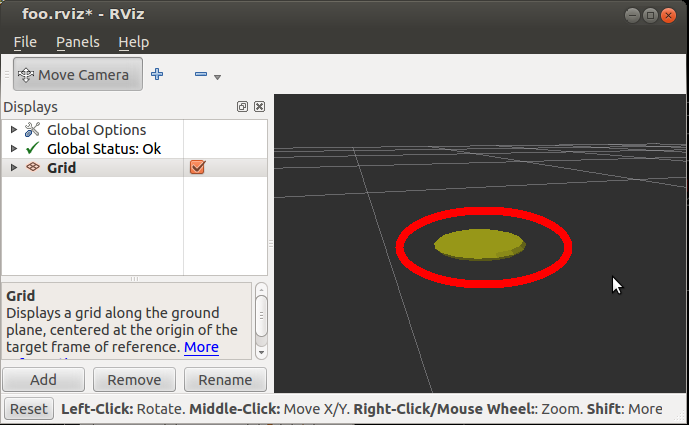
The orbital camera simply rotates around a focal point, while always looking at that point. The focal point is visualized as a small disc while you’re moving the camera:
Controls:
Left mouse button: Click and drag to rotate around the focal point.
Middle mouse button: Click and drag to move the focal point in the plane formed by the camera’s up and right vectors. The distance moved depends on the focal point – if there is an object on the focal point, and you click on top of it, it will stay under your mouse.
Right mouse button: Click and drag to zoom in/out of the focal point. Dragging up zooms in, down zooms out.
Scrollwheel: Zoom in/out of the focal point
‘f’ key: move the focal point to whatever 3D object is currently under the mouse.
XYOrbit
The “XYOrbit” view controller is similar to Orbit, but the focal point is constrained to move only in the XY plane. Also, the focal point is kept lower in the window and is cyan colored.
Controls:
Left mouse button: Click and drag to rotate around the focal point.
Middle mouse button: Click and drag to move the focal point in the XY plane. The distance moved depends on the focal point – if there is an object on the focal point, and you click on top of it, it will stay under your mouse.
Right mouse button: Click and drag to zoom in/out of the focal point. Dragging up zooms in, down zooms out.
Scrollwheel: Zoom in/out of the focal point
‘f’ key: move the focal point to whatever 3D object is currently under the mouse.
FPS (first-person shooter)
The FPS camera is a first-person camera, so it rotates as if you’re looking with your head.
Controls:
Left mouse button: Click and drag to rotate. Control-click to pick the object under the mouse and look directly at it.
Middle mouse button: Click and drag to move along the plane formed by the camera’s up and right vectors
Right mouse button: Click and drag to move along the camera’s forward vector. Dragging up moves forward, down moves backward.
Scrollwheel: Move forward/backward
Top-down Orthographic
The top-down orthographic camera always looks down along the Z axis (in the robot frame), and is an orthographic view which means things do not get smaller as they get farther away.
Controls:
Left mouse button: Click and drag to rotate around the Z axis
Middle mouse button: Click and drag to move the camera along the XY plane
Right mouse button: Click and drag to zoom the image
Scrollwheel: Zoom the image
Coordinate Frames
RViz uses the tf transform system for transforming data from the coordinate frame it arrives in into a global reference frame. There are two coordinate frames that are important to know about in the visualizer. Here is a video that explains them both.
The Fixed Frame
The more-important of the two frames is the fixed frame. The fixed frame is the reference frame used to denote the “world” frame. This is usually the “map”, or “world”, or something similar, but can also be, for example, an odometry frame.
If the fixed frame is erroneously set to, say, the base of the robot, then all the objects the robot has ever seen will appear in front of the robot, at the position relative to the robot at which they were detected. For correct results, the fixed frame should not be moving relative to the world.
If the fixed frame is changed, all data currently being shown is cleared rather than re-transformed.
The Target Frame
Most view controllers provide a “target frame” which provides a reference frame for the camera view. For example, if the target frame is the map, you’ll see the robot driving around the map. If the target frame is the base of the robot, the robot will stay in the same place while everything else moves relative to it. The built-in view controllers use the target frame only for position, and ignore its orientation, so when the robot rotates, you will see it spin, but when it drives it will stay in the same place in the view.
Tools
The visualizer has a number of tools that can be used on the toolbar:
Move Camera
Keyboard shortcut: m
The Move Camera tool is the default tool. When this is selected, the current View gets to do its thing when you click inside the 3d view.
Interact
Keyboard shortcut: i
The Interact tool allows the use of Interactive Marker displays. When the mouse is not over an interactive element, it behaves like the Move Camera tool.
Select
Keyboard shortcut: s
The Select tool allows you to select items being displayed in the 3D view. It supports single-point selection as well as click/drag box selection.
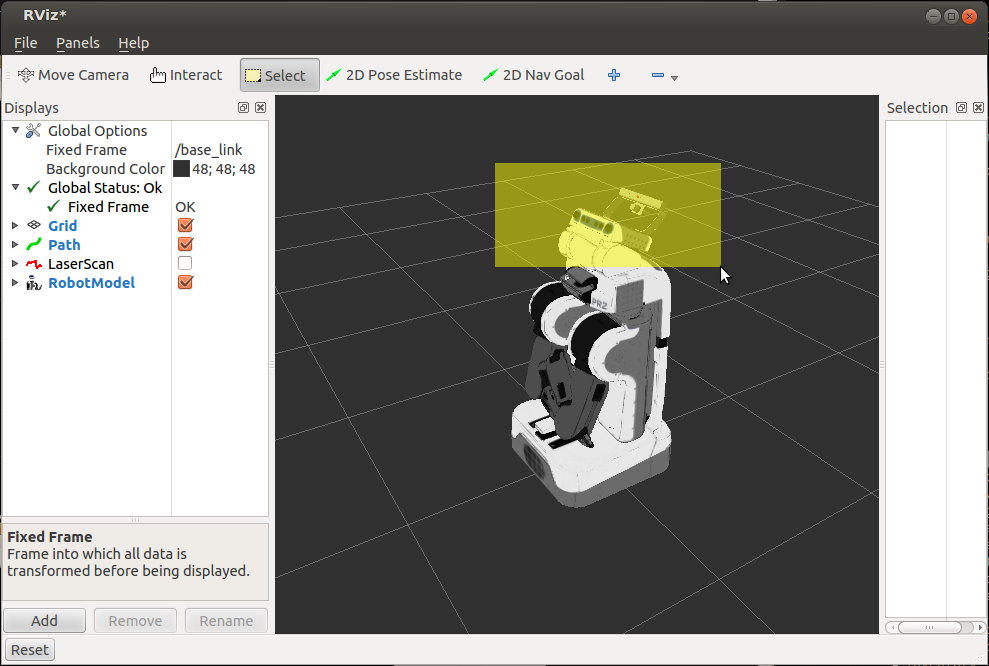
Once objects are selected, they are surrounded by cyan-colored bounding boxes, and information about the selected objects can be viewed in the “Selection” panel. Here you can see the position of the robot link “head_tilt_link” has been expanded to show the XYZ coordinates:
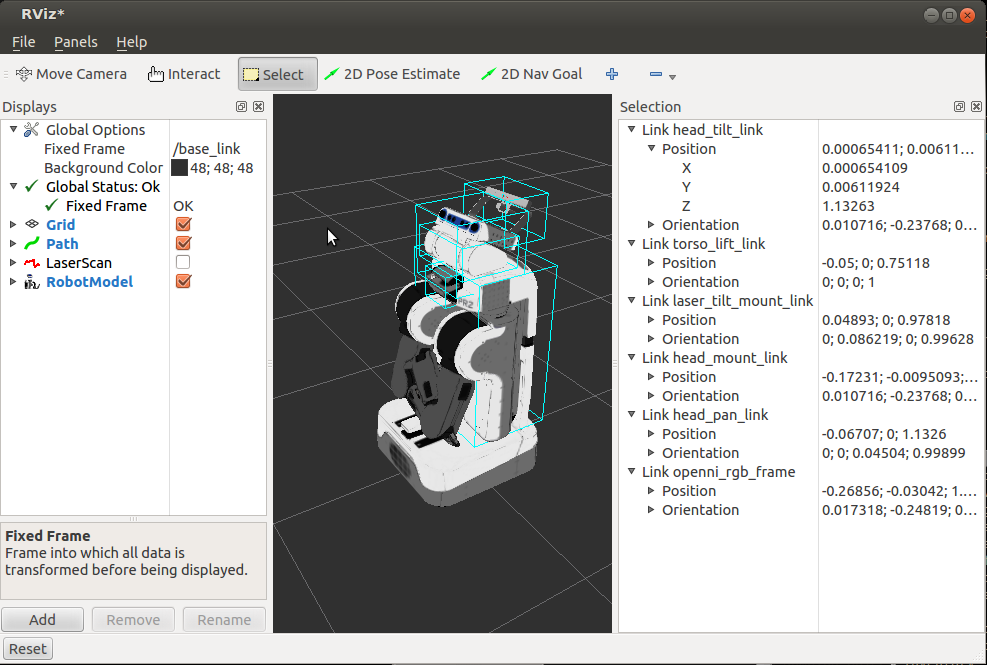
You can add to a selection with the Shift key, and remove from the selection with the Ctrl key. If you want to move the camera around while selecting without switching back to the Move Camera tool you can hold down the Alt key.
The f key will focus the camera on the current selection.
2D Goal Pose
Keyboard shortcut: g
This tool lets you set a goal sent on the “/goal_pose” ROS topic. Click on a location on the ground plane and drag to select the orientation. The output topic can be changed in the “Tool Properties” panel.
This tool works with the navigation stack.
2D Pose Estimate
Keyboard shortcut: p
This tool lets you set an initial pose to seed the localization system (sent on the “/initialpose” ROS topic). Click on a location on the ground plane and drag to select the orientation. The output topic can be changed in the “Tool Properties” panel.
This tool works with the navigation stack.
Time
The Time panel is mostly useful when running in a simulator: it allows you to see how much ROS Time time has passed, vs. how much “Wall Clock” (aka real) time has passed.
The time panel also lets you reset the visualizer’s internal time state – this causes a reset of all the displays, as well as a reset of tf’s internal cache of data. The keyboard shortcut for this “reset” functionality is “r”.

If you are not running in simulation, the time panel is mostly useless. In most cases it can be closed and you will probably not even notice (other than having a bit more screen real estate for the rest of rviz).
Plugins
RViz is setup so that new displays, tools, view controllers, and panels can be added through plugins. Installed plugins are indexed and made available within RViz automatically.
For information on writing your own RViz plugin, see the plugin tutorials within the RViz tutorials wiki page.