README
Analog Devices 3DToF ADTF31xx
Overview
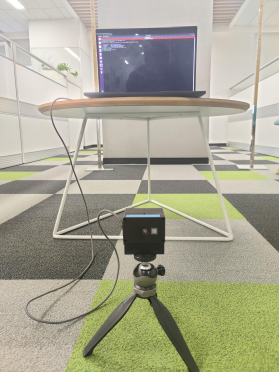
The ADI 3DToF ADTF31xx is a ROS (Robot Operating System) package for working with ADI’s EVAL-ADTF3175D-NXZ ToF sensor. This node captures the Depth and AB frames from the sensor and publishes them as ROS topics. The node uses ADI ToF SDK APIs to capture frames from the sensor. The node publishes Depth and AB Images at different resolutions.
![]()
Hardware
USB Type-C to Type-A cable - with 5gbps data speed support
Host laptop with intel i5 of higher cpu running Ubuntu-22.04LTS
[!note] Refer the EVAL-ADTF3175D-NXZ User Guide to ensure the Eval module has adequate power supply during operation.
[!important] The EVAL-ADTF3175D-NXZ Sensor module must have a firmware version of at least 5.2.5.0. Refer to user guide on firmware upgrade, or see upgrading the firmware.
Operation Modes
This package has three different operation modes. Refer to the following intra-links to setup the package accordingly.
Camera Sensor Mode
The package is built on the sensor module and directly interfaces with the image sensor. The adi_3dtof_nxp_ubuntu_20_04_relx.x.x.img provided for the EVAL-ADTF3175D-NXZ sensor already contains this ROS package and is pre-built. In order to use this package, first we need to connect the sensor to the PC, and then SSH into it:
SSH into the Sensor
ssh analog@10.43.0.1
   Password: analog
Source ROS Humble
source /opt/ros/humble/install/setup.bash
Source the workspace
source ~/ros2_ws/install/setup.bash
Launch the
adi_3dtof_adtf31xxpackage.
ros2 launch adi_3dtof_adtf31xx adi_3dtof_adtf31xx_launch.py arg_input_sensor_mode:=0
[!note] The operation mode is determined by the launch parameter
arg_input_sensor_mode:=0. This can be modified in the launch file. Refer to the parameter table to see what other parameters can be passed.
Updating the package
[!warning] The time and date may be incorrect on the sensor and this can cause issues in updating the package. To update the time and date, refer to updating date and time.
In order to update and rebuild package to the latest version, run the following commands:
cd ~/ros2_ws/src/adi_3dtof_adtf31xx
git pull
cd ~/ros2_ws
export MAKEFLAGS="-j1"
colcon build --symlink-install --executor sequential --cmake-args -DCMAKE_BUILD_TYPE=Release -DNXP=1 --packages-up-to adi_3dtof_adtf31xx
File-IO Mode
In this camera mode, the package is built on the Host PC in order to evaluate the properties of the package by running a pre-recorded bin file which contains the outputs from the sensor module.
Building the package for file-io
On your PC, create a workspace
mkdir -p ~/ros2_ws/src
Clone the repository
cd ~/ros2_ws/src
git clone https://github.com/analogdevicesinc/adi_3dtof_adtf31xx.git -b v2.1.0
cd ..
Build the workspace
rosdep install --from-paths src --ignore-src -r -y
colcon build --symlink-install --cmake-args -DCMAKE_BUILD_TYPE=Release -DSENSOR_CONNECTED=False
Running the node in file-io
In order to run the package in file-io, it needs input files provided in the release image. Follow the steps below to use existing bin files, or follow these steps to create your own bin files.
Go to the installation directory of the ADI 3DToF ADTF31xx application
~/Analog Devices/ADI3DToFADTF31xx-Rel2.1.0Run the
get_videos.shscript which will download theadi_3dtof_input_video_files.zipfile in the current directory.Unzip it and copy the directory to
~/ros2_ws/src/adi_3dtof_input_video_files.Update the input file argument
arg_in_file_namein the launch fileadi_3dtof_adtf31xx_launch.pyas per the above file path.Run the following commands:
# Source the workspace
source ~/ros2_ws/install/setup.bash

# Launch the package
ros2 launch adi_3dtof_adtf31xx adi_3dtof_adtf31xx_launch.py arg_input_sensor_mode:=2
[!note] The
arg_input_sensor_mode:=2sets the node to operate in file-io mode. This can be set in the launch file. Refer to the parameter table to see what other parameters can be passed.
Network Mode
The sensor can be operated in network mode where depth and AB (Active Brightness) images are fetched over the local area network. The simplest way to use this is to connect the sensor directly to the PC so that a network interface via USB is created with a default IP address of 10.43.0.1. In order to use the network mode, follow the following steps:
Building the package
The adi_3dtof_adtf31xx depends on libaditof in order to communicate with the sensor. So we will need to build this in the same workspace as adi_3dtof_adtf31xx.
On your PC, create the workspace and clone the required repositories.
mkdir -p ~/ros2_ws/src
cd ~/ros2_ws/src
git clone https://github.com/analogdevicesinc/adi_3dtof_adtf31xx.git -b v2.1.0
git clone https://github.com/analogdevicesinc/libaditof.git -v v6.0.1

# Initialize the submodules for libaditof
cd libaditof
git submodule update --init --recursive

# Return to root of workspace folder
cd ../..
Install dependencies
rosdep install --from-paths src --ignore-src -r -y
Build the packages
colcon build --symlink-install --cmake-args -DCMAKE_BUILD_TYPE=Release -DSENSOR_CONNECTED=True --packages-up-to adi_3dtof_adtf31xx
source install/setup.bash
Running the node in network mode
To run the node in network mode, run
ros2 launch adi_3dtof_adtf31xx adi_3dtof_adtf31xx_launch.py arg_input_sensor_mode:=3 arg_input_sensor_ip:=10.43.0.1
[!note] The
arg_input_sensor_mode:=3sets the node to operate in network mode. This value can be adjusted in the launch file.arg_input_sensor_ipmust be set to the IP of the sensor. Refer to the parameter table to see what other parameters can be passed.
Parameters
Parameter |
Type |
Default |
Description |
|---|---|---|---|
arg_input_sensor_mode |
int |
0 |
Input mode, |
arg_in_file_name |
String |
“no name” |
Input filename : Applicable only if the input mode is 2 |
arg_ab_threshold |
int |
10 |
abThreshold for the sensor |
arg_confidence_threshold |
int |
10 |
confidenceThreshold for the sensor |
arg_enable_depth_ab_compression |
bool |
False |
Enables RVL compression for the depth images |
arg_config_file_name_of_tof_sdk |
String |
“config/config_adsd3500_adsd3100.json” |
Configuration file name for ToF SDK |
arg_camera_mode |
int |
3 |
Camera Mode |
arg_encoding_type |
String |
mono16 |
Sets encoding String. Use only |
arg_enable_depth_publish |
bool |
True |
Enable publishing of depth images |
arg_enable_ab_publish |
bool |
True |
Enable publishing of AB images |
arg_enable_conf_publish |
bool |
True |
Enable publishing of confidence images |
arg_enable_point_cloud_publish |
bool |
False |
Enable publishing of point cloud data |
Camera Modes
Imager Type |
Mode Name |
Mode Value |
|---|---|---|
sr-native |
0 |
|
lr-native |
1 |
|
sr-qnative |
2 |
|
lr-qnative |
3 |
|
sr-mixed |
5 |
|
lr-mixed |
6 |
|
sr-native |
0 |
|
lr-native |
1 |
|
lr-qnative |
3 |
|
sr-mixed |
5 |
|
lr-mixed |
6 |
|
Other modes |
- |
- |
Topics
Topic |
Description |
|---|---|
/depth_image |
16-bit Depth image of size |
/ab_image |
16-bit AB image |
/conf_image |
16-bit Confidence image |
/camera_info |
Camera info |
/depth_image/compressedDepth |
16-bit Depth image from sensor node compressed with RVL compression |
/ab_image/compressedDepth |
16-bit AB image from sensor node compressed with RVL compression |
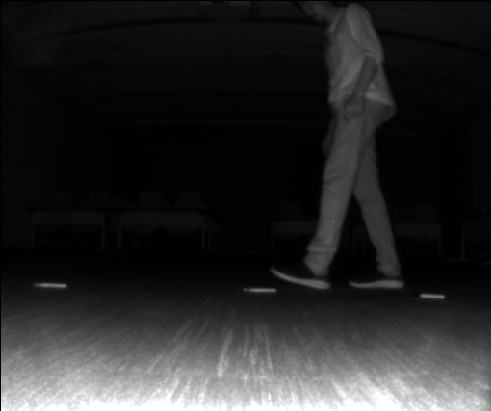
Outputs
Sample output images are shown below:
/cam1/depth_image

/cam1/ab_image
Parameter Tuning
Some parameters of adi_3dtof_adtf31xx ROS node can be modified during run time. The Perspective file is present in rqt_config/ folder.
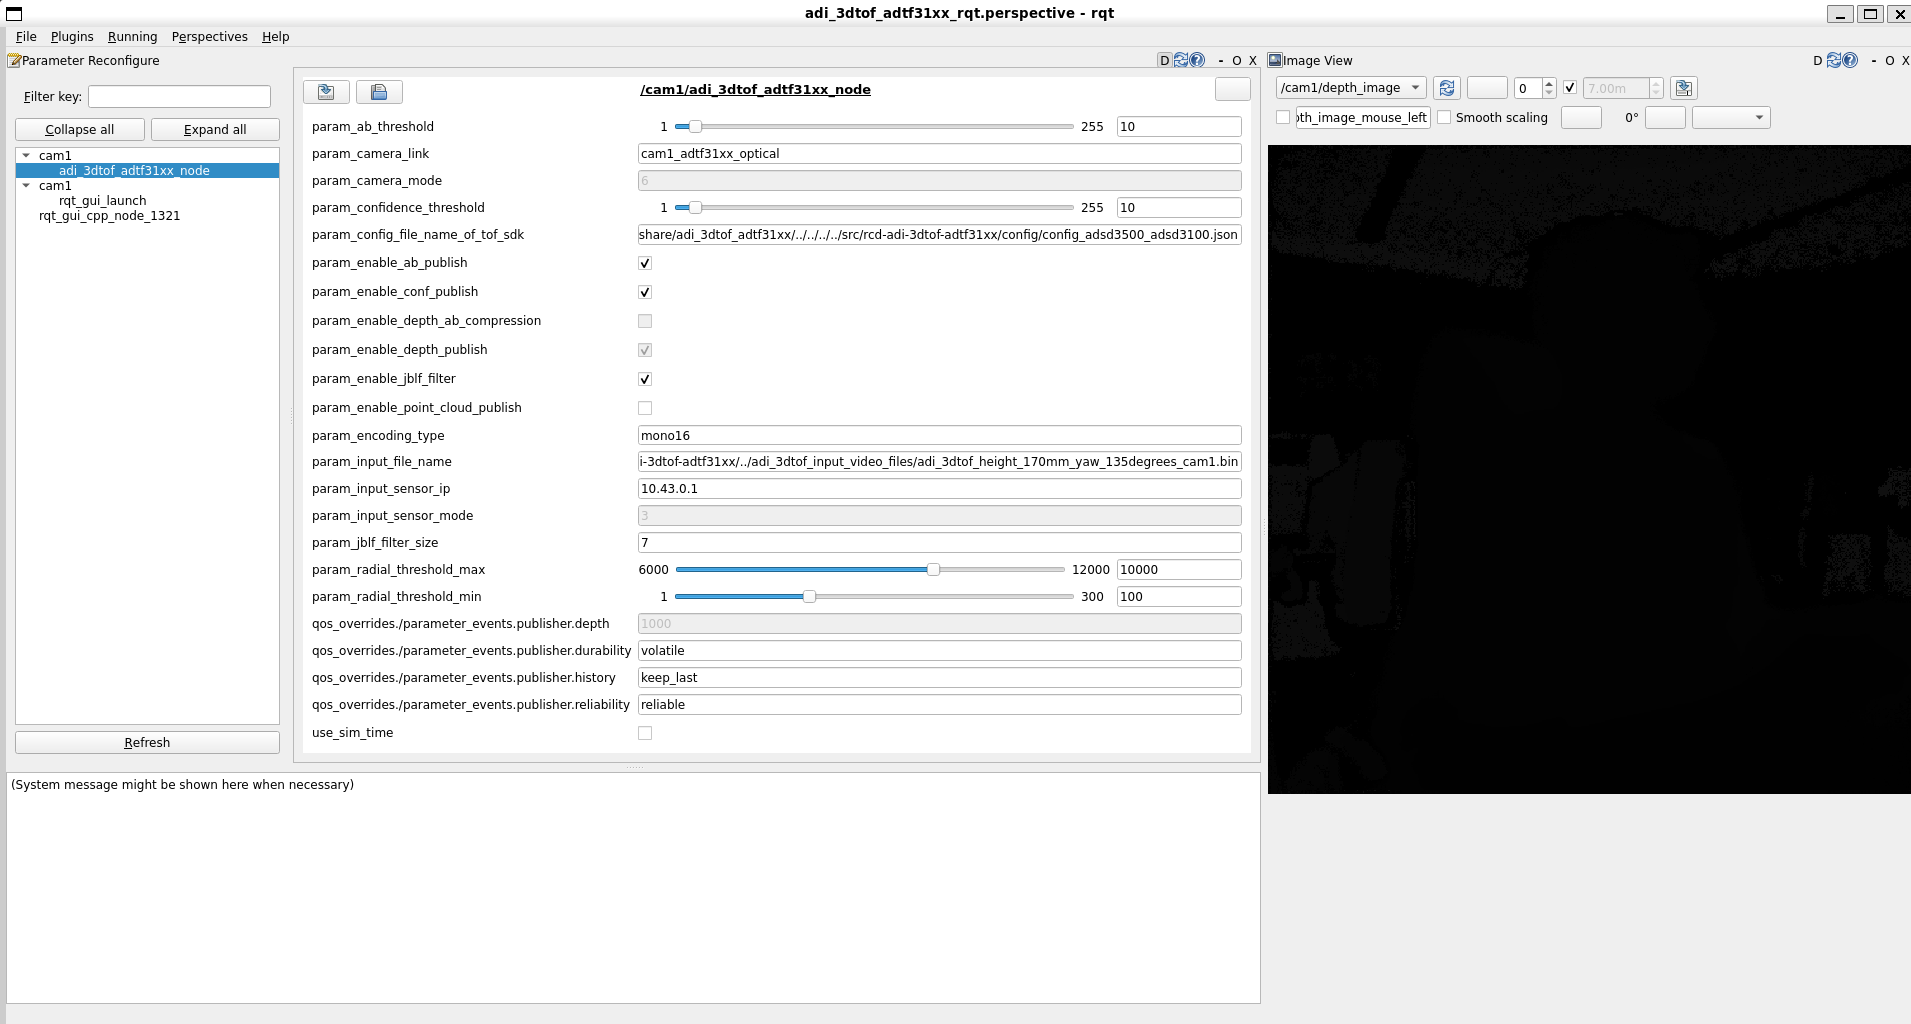
The GUI can be started by running the following command.
ros2 launch adi_3dtof_adtf31xx adi_3dtof_adtf31xx_rqt_launch.py
Make sure the adi_3dtof_adtf31xx node is already running before executing this command.
Appendix
Updating Date and Time
The customized ubuntu image loaded into the sensor will automatically connect to any WiFi hotspot with the SSID as ADI and password set as analog123. This network connection will automatically sync the system time using the available internet connection.
Build Flags
Flag Name |
Type |
Default Value |
Description |
|---|---|---|---|
SENSOR_CONNECTED |
BOOL |
TRUE |
Indicates if the sensor is connected |
BUILD_EXAMPLE_SUBSCRIBER_NODE |
BOOL |
FALSE |
Builds an example subscriber node that uncompresses depth and AB images |
BUILD_READ_ROSBAG_NODE |
BOOL |
FALSE |
Builds a node that converts recorded rosbags to binary files used for FileIO |
Upgrading the firmware
To check the existing firmware version, log into the sensore device via SSH.
$ ssh analog@10.43.0.1
   Username: analog
   Password: analog
Run command:
cd ~/Workspace/Tool/ctrl_app
./ctrl_app
Your output would look like this:
V4L2 custom control interface app version: 1.0.1
59 31
05 02 05 00 61 35 39 61 66 61 64 36 64 36 63 38 65 37 66 62 31 35 33 61 32 64 62 38 63 64 38 38 34 30 33 35 39 66 31 37 31 39 35 61
59 31
The first four values in the third line represents the version number, in this case, 5.2.5.0. If it is lower than this value, follow these steps below to update.
On your PC, install ADI ToF SDK release v6.0.1
After installing goto the installation folder and run the following commands to download the image
cd ~/Analog\ Devices/ToF_Evaluation_Ubuntu_ADTF3175D-Relx.x.x/image.
chmod +x get_image.sh and ./get_image.sh.
Latest image will be downloaded at ./image path as NXP-Img-Relx.x.x-ADTF3175D-.zip. Extract this folder using unzip NXP-Img-Relx.x.x-ADTF3175D-.zip command.
This folder contains the NXP image and ADSD3500 firmware(Fw_Update_x.x.x.bin).
Run the following command to copy the Firmware to the NXP device
$ scp Fw_Update_5.2.5.bin analog@10.43.0.1:/home/analog/Workspace
   Username: analog
   Password: analog
Now login to the device and run the Firmware upgrade command.
[!warning] Do NOT reboot the board or interrupt the process as this may corrupt the module
$ ssh analog@10.43.0.1
   Username: analog
   Password: analog
$ cd Workspace/ToF/build/examples/data_collect/
$ ./data_collect --fw ~/Workspace/Fw_Update_x.x.x.bin config/config_default.json
Reboot the board after the successful operation.
Creating Bin files for File-IO
rosbag2, a utility provided by ROS, is used to record topics. The data is collected in bag format, and the adi_3dtof_adtf31xx_read_rosbag_node node converts it to bin file format. The format of bin file as given below.
start of bin file

4 byte uint32_t = total frames in bin file.
4 byte uint32_t = image width.
4 byte uint32_t = image height.
4 byte uint32_t = number of bytes per pixel.
4 byte uint32_t = version of generated binary file.
4 byte uint32_t = first frame position( End of header position).
4 byte uint32_t = frame pitch ( number of bytes in one frame).
8 byte long = device timestamp.

till first frame position some header bits are present.
Here header bits are camera_info
K ( 9 doubles = 72 bytes)
size of D ( 1 uint32_t = 4 bytes)
D ( based on size of D, size of D * double)
R ( 9 doubles = 72 bytes)
P ( 12 doubles = 96 bytes)

a single frame contains..
8 byte depth timestamp, depth data, 8 byte AB timestamp, AB data.

n number of frames

end of bin file
Steps to use adi_3dtof_adtf31xx_read_rosbag_node:
Change below parameters in adi_3dtof_adtf31xx_read_rosbag_launch.py file
arg_in_file_name : The rosbag2 file name
arg_camera_prefixes : Camera prefix, more than one camera prefixes can be passed. For example if the recorded topic names are /cam1/depth_image and /cam2/depth_image, arg_camera_prefixes can be set to “[cam1,cam2]”
Run the below command to launch adi_3dtof_adtf31xx_read_rosbag_node node
$ ros2 launch adi_3dtof_adtf31xx adi_3dtof_adtf31xx_read_rosbag_launch.py
The output files will have names in following manner: input_file_name_camera_name_out.bin Ex: if input file name is
4cameras.bagand camera prefix iscam5then output is4cameras_cam5_out.bin
Why is this required?
The reason for this is that rosbags may store images in a disorganized order rather than in a sequential manner. For this reason, in order to produce the output, the FileIO code must queue up the publishing rosbag images and synchronize the depth and AB images. The FileIO process becomes slower as a result.