RViz Python Tutorial
Overview
RViz is not just a visualizer application, it is also a Python library! Much of RViz’s functionality can be accessed from Python code by importing the librviz Python bindings.
This tutorial shows a simple example of creating a visualizer (rviz::VisualizationFrame) as a child widget along with other Qt widgets, programmatically loading a config file, then connecting a slider and some Qt push buttons to change display a display property and the viewpoint.
The source code for this tutorial is in the rviz_python_tutorial package. You can check out the source directly or (if you use Ubuntu) you can just apt-get install the pre-compiled Debian package like so:
sudo apt-get install ros-groovy-visualization-tutorials
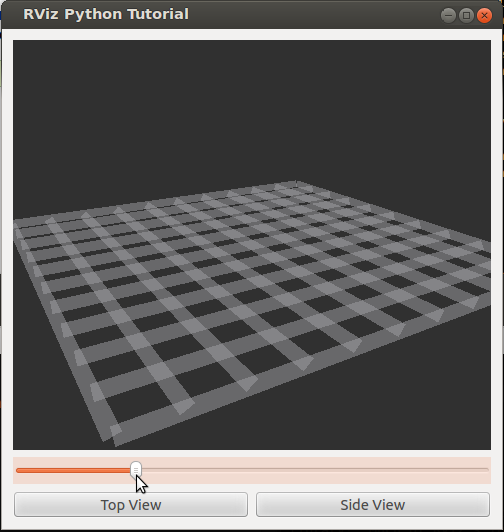
The running application looks like this:
The Code: myviz.py
The full text of myviz.py is here: myviz.py
Imports
First we start with the standard ros Python import line:
import roslib; roslib.load_manifest('rviz_python_tutorial')
Then load sys to get sys.argv.
import sys
Next import all the Qt bindings into the current namespace, for convenience. This uses the “python_qt_binding” package which hides differences between PyQt and PySide, and works if at least one of the two is installed. The RViz Python bindings use python_qt_binding internally, so you should use it here as well.
from python_qt_binding.QtGui import *
from python_qt_binding.QtCore import *
Finally import the RViz bindings themselves.
import rviz
The MyViz class is the main container widget.
class MyViz( QWidget ):
MyViz Constructor
Its constructor creates and configures all the component widgets: frame, thickness_slider, top_button, and side_button, and adds them to layouts.
def __init__(self):
    QWidget.__init__(self)
rviz.VisualizationFrame is the main container widget of the regular RViz application, with menus, a toolbar, a status bar, and many docked subpanels. In this example, we disable everything so that the only thing visible is the 3D render window.
self.frame = rviz.VisualizationFrame()
The “splash path” is the full path of an image file which gets shown during loading. Setting it to the empty string suppresses that behavior.
self.frame.setSplashPath( "" )
VisualizationFrame.initialize() must be called before VisualizationFrame.load(). In fact it must be called before most interactions with RViz classes because it instantiates and initializes the VisualizationManager, which is the central class of RViz.
self.frame.initialize()
The reader reads config file data into the config object. VisualizationFrame reads its data from the config object.
reader = rviz.YamlConfigReader()
config = rviz.Config()
reader.readFile( config, "config.myviz" )
self.frame.load( config )
You can also store any other application data you like in the config object. Here we read the window title from the map key called “Title”, which has been added by hand to the config file.
self.setWindowTitle( config.mapGetChild( "Title" ).getValue() )
Here we disable the menu bar (from the top), status bar (from the bottom), and the “hide-docks” buttons, which are the tall skinny buttons on the left and right sides of the main render window.
self.frame.setMenuBar( None )
self.frame.setStatusBar( None )
self.frame.setHideButtonVisibility( False )
frame.getManager() returns the VisualizationManager instance, which is a very central class. It has pointers to other manager objects and is generally required to make any changes in an rviz instance.
self.manager = self.frame.getManager()
Since the config file is part of the source code for this example, we know that the first display in the list is the grid we want to control. Here we just save a reference to it for later.
self.grid_display = self.manager.getRootDisplayGroup().getDisplayAt( 0 )
Here we create the layout and other widgets in the usual Qt way.
layout = QVBoxLayout()
layout.addWidget( self.frame )

thickness_slider = QSlider( Qt.Horizontal )
thickness_slider.setTracking( True )
thickness_slider.setMinimum( 1 )
thickness_slider.setMaximum( 1000 )
thickness_slider.valueChanged.connect( self.onThicknessSliderChanged )
layout.addWidget( thickness_slider )

h_layout = QHBoxLayout()

top_button = QPushButton( "Top View" )
top_button.clicked.connect( self.onTopButtonClick )
h_layout.addWidget( top_button )

side_button = QPushButton( "Side View" )
side_button.clicked.connect( self.onSideButtonClick )
h_layout.addWidget( side_button )

layout.addLayout( h_layout )

self.setLayout( layout )
Handle GUI events
After the constructor, for this example the class just needs to respond to GUI events. Here is the slider callback. rviz.Display is a subclass of rviz.Property. Each Property can have sub-properties, forming a tree. To change a Property of a Display, use the subProp() function to walk down the tree to find the child you need.
def onThicknessSliderChanged( self, new_value ):
    if self.grid_display != None:
        self.grid_display.subProp( "Line Style" ).subProp( "Line Width" ).setValue( new_value / 1000.0 )
The view buttons just call switchToView() with the name of a saved view.
def onTopButtonClick( self ):
    self.switchToView( "Top View" );

def onSideButtonClick( self ):
    self.switchToView( "Side View" );
switchToView() works by looping over the views saved in the ViewManager and looking for one with a matching name.
view_man.setCurrentFrom() takes the saved view instance and copies it to set the current view controller.
def switchToView( self, view_name ):
    view_man = self.manager.getViewManager()
    for i in range( view_man.getNumViews() ):
        if view_man.getViewAt( i ).getName() == view_name:
            view_man.setCurrentFrom( view_man.getViewAt( i ))
            return
    print( "Did not find view named %s." % view_name )
Start the Application
That is just about it. All that’s left is the standard Qt top-level application code: create a QApplication, instantiate our class, and start Qt’s main event loop (app.exec_()).
if __name__ == '__main__':
    app = QApplication( sys.argv )

    myviz = MyViz()
    myviz.resize( 500, 500 )
    myviz.show()

    app.exec_()
Running
Just type:
roscd rviz_python_tutorial
./myviz.py
myviz.py loads its config file from the current directory, so you need to run it from the directory it comes in, or adapt the script to find the file.
There are more classes in RViz which do not yet have Python bindings. If you find important ones are missing, please request them as “enhancement” issues on the RViz project on github.